
Wood fired pizza
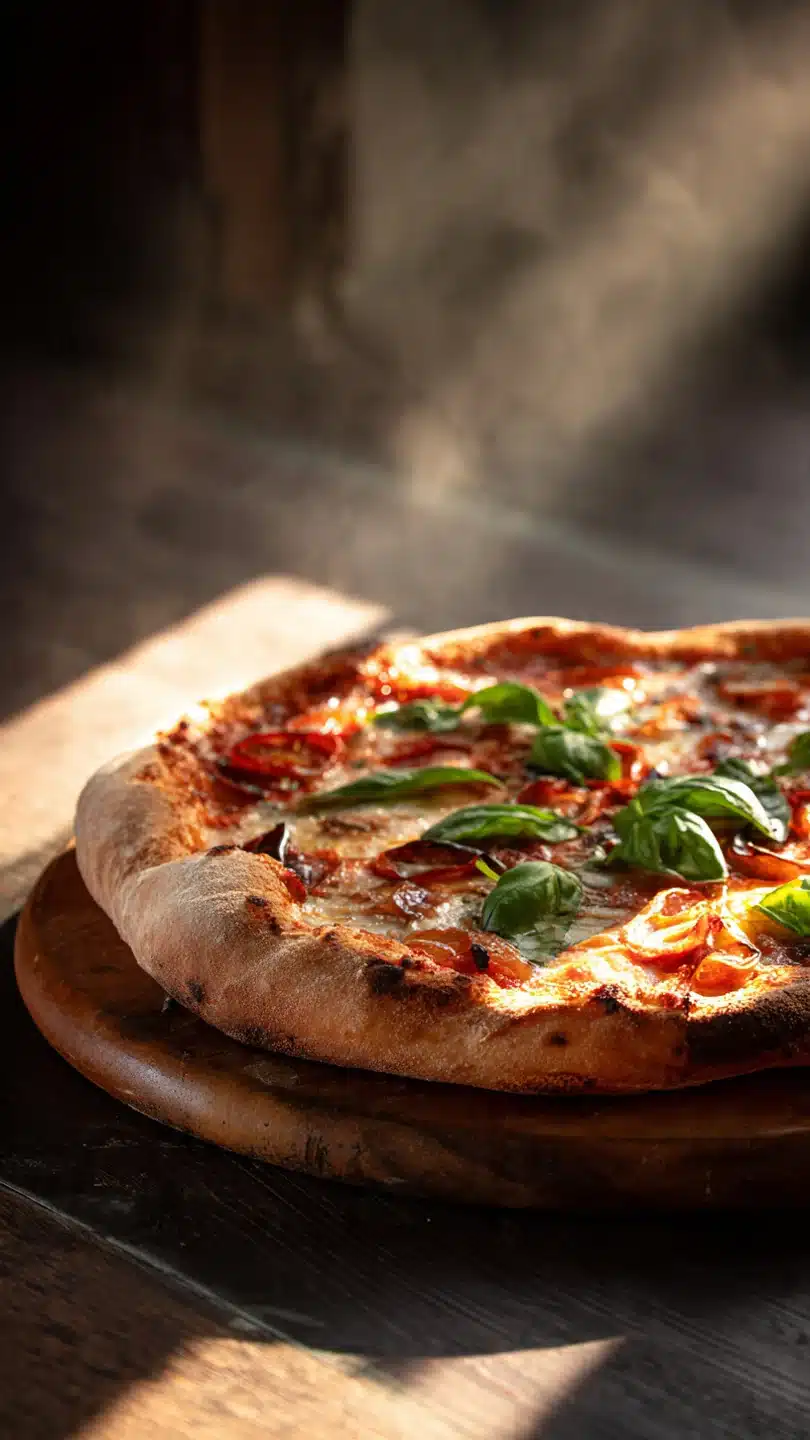
There’s a primal magic to a perfect wood-fired pizza. It’s not just a meal; it’s an experience. The sight of a blistered, leopard-spotted crust emerging from intense heat, the aroma of charred bread and bubbling cheese, the satisfying crunch giving way to a tender, airy interior—it’s culinary alchemy.
For years in professional kitchens, I chased that perfect bake, learning that the secret isn’t a secret at all, but a series of precise, manageable steps. While a backyard pizza oven is a dream, you can capture that authentic wood-fired spirit right in your home kitchen. This guide will walk you through the science and technique of crafting a pizza with a professional-quality crust, using equipment you likely already own.
- Authentic Texture & Flavor: Achieve that signature charred, blistered crust and tender, airy crumb that defines great Neapolitan-style pizza.
- Surprisingly Simple Ingredients: The dough requires just flour, water, yeast, and salt. The magic is in the technique, not a long grocery list.
- Customizable Canvas: Master the base recipe, then top it with anything from classic Margherita to your own creative combinations.
- Interactive & Fun: Making pizza is a fantastic hands-on activity for cooking with family or friends.
- Faster Than Delivery: Once your dough is ready, each pizza cooks in just 4-6 minutes, delivering fresh, hot results on your schedule.
- Proven Techniques: Every tip comes from 15 years of kitchen experience, tested to ensure your home success.
Ingredients You’ll Need
Let’s gather our simple, high-quality components. Using the right flour and not overcomplicating the sauce are your first steps to pizza perfection.
- 00 Flour or Bread Flour: This is non-negotiable for structure. “00” flour is finely milled Italian flour ideal for tender, stretchy dough. A good high-protein bread flour (around 12-13% protein) is an excellent, more accessible substitute.
- Warm Water: Aim for about 105°F (40°C)—warm to the touch but not hot. This perfectly activates the yeast without killing it.
- Active Dry Yeast: A small amount gives our dough a long, slow rise for better flavor development.
- Fine Sea Salt: Enhances flavor and strengthens the gluten network. Add it separately from the yeast.
- San Marzano Tomatoes: The gold standard for pizza sauce. Their sweet, low-acid flavor and fleshy texture make a vibrant, uncooked sauce. Look for the DOP certification.
- Fresh Mozzarella: Sold in water (mozzarella di bufala or fior di latte). Drain it well and tear it—don’t slice—for those beautiful, melting pockets.
- Fresh Basil & Extra Virgin Olive Oil: Added after baking for a burst of fresh aroma and flavor. A final drizzle of good olive oil is the chef’s kiss.
Kitchen Equipment Needed
You don’t need a wood-burning oven. The right tools help mimic its intense, radiant heat.
- Pizza Stone or Baking Steel: This is the most important piece. It absorbs and radiates extreme heat, instantly cooking the dough from below to create a crisp crust. A steel conducts heat even more efficiently than a stone.
- Pizza Peel: A flat paddle for safely sliding the pizza onto the hot stone and retrieving it. A rimless baking sheet can work in a pinch.
- Digital Kitchen Scale: Trust me, for baking, weight is accurate and consistent. Cup measurements for flour are too variable.
- Large Mixing Bowl & Bench Scraper: For mixing dough and cleanly dividing it.
How to Make Wood-Fired Pizza Recipe
Step 1: Mix and Knead the Dough
In your large bowl, combine the warm water and yeast, giving it a quick stir. Let it sit for about 5 minutes; you should see a foamy layer form, proving your yeast is active. Add the flour and salt.
Mix with a sturdy spoon until a shaggy mass forms. Tip it onto a clean, unfloured counter. Now, knead.
Use the heels of your hands to push the dough away, then fold it back over itself. Do this for 8-10 minutes. You’ll feel it transform from sticky and ragged to incredibly smooth, elastic, and slightly tacky.
This develops the gluten network that will trap air and create that beautiful, open crumb.
Step 2: The First Rise and Simple Sauce
Place your smooth dough ball into a lightly oiled bowl, turning it once to coat. Cover the bowl with plastic wrap or a damp kitchen towel. Let it rise at room temperature (around 70°F/21°C) for about 1 hour, or until roughly doubled in size.
Meanwhile, make your sauce. Pour the canned San Marzano tomatoes into a bowl and crush them thoroughly with your clean hands—it’s satisfying and gives you the perfect rustic texture. Stir in the minced garlic, a tablespoon of olive oil, and a pinch of salt.
That’s it. No cooking required. This raw sauce preserves the tomatoes’ bright, sweet acidity.
Step 3: Shape the Dough Balls
Once your dough has doubled, punch it down gently to release the large air bubbles. Turn it out onto a lightly floured surface. Using your bench scraper or a knife, divide it into 4 equal pieces (weigh them for accuracy).
To shape each into a tight ball, cup your hand over a piece and move it in small, fast circles on the counter, tucking the edges underneath to create surface tension. Place each ball on a lightly floured tray, spacing them apart. Cover with a damp towel and let them rest for 30 minutes.
This “bench rest” relaxes the gluten, making the dough incredibly easy to stretch without snapping back.
Step 4: Preheat Your “Hearth”
This step cannot be rushed. At least 45 minutes before you plan to bake, place your pizza stone or steel on a rack positioned in the top third of your oven. Preheat your oven to its absolute maximum temperature, typically 500-550°F (260-290°C).
If using a grill, prepare it for direct, high heat, aiming for at least 600°F (315°C). You want that cooking surface to be screaming hot—this is what mimics the radiant heat floor of a wood-fired oven and will give you instant oven spring and char.
Step 5: Stretch, Top, and Launch
Lightly flour your pizza peel. Take one dough ball and press it gently into a flat disc with your fingertips, leaving the outer inch untouched as the future crust. Now, lift it and gently stretch it over your knuckles, letting gravity help you work it into a 10-12 inch round.
Lay it on the floured peel. Quickly add your toppings: a thin, even layer of sauce (about 3-4 tablespoons), followed by torn pieces of well-drained mozzarella. Give the peel a gentle shake to ensure the pizza isn’t stuck.
Then, with a confident forward jerk, slide it onto the preheated stone. Believe me, that quick, decisive motion is key.
Step 6: The Bake and Final Touch
Watch closely. In 4-6 minutes, magic happens. The crust will puff up dramatically, and you’ll see beautiful black leopard spots form on the edges.
The cheese will be fully melted and bubbly. Use the peel to carefully remove the pizza and transfer it to a cutting board. Immediately tear fresh basil leaves over the top and finish with a drizzle of your best extra virgin olive oil.
Let it rest for just a minute—this allows the cheese to set slightly—then slice and serve. Repeat with the remaining dough, allowing the stone to reheat for a few minutes between bakes.
- Flour is Key: The protein content directly affects your crust. Bread flour creates a chewier, New York-style crust, while 00 flour yields a more tender, Neapolitan-style crust with better char.
- The Long, Cold Ferment Option: For incredible depth of flavor, after the first rise, place the dough balls in individual oiled containers, cover tightly, and refrigerate for 1-3 days. Remove them 2 hours before baking to come to room temperature.
- Less is More with Toppings: Overloading is the number one home cook mistake. A thin layer of sauce and a modest amount of cheese ensure the crust cooks through and stays crisp.
- Master the Peel Launch: Always do a final shake of the peel right before launching. If the dough sticks, lift the edge and toss a little more flour or semolina underneath.
- Don’t Chase Perfection: A few charred spots are desirable—they’re called leoparding and add bitter complexity that balances the sweet sauce and cheese. Embrace them!
Recipe Variations
- White Pizza (Pizza Bianca): Skip the tomato sauce. Brush the stretched dough with olive oil and minced garlic, then top with ricotta, mozzarella, and sautéed spinach.
- Spicy Soppressata & Honey: After baking, top with thinly sliced spicy soppressata or pepperoni and a light drizzle of hot honey for a perfect sweet-heat combination.
- Grilled Vegetable: Top with pre-grilled slices of zucchini, eggplant, and bell peppers, along with dollops of goat cheese and a balsamic glaze finish.
- Breakfast Pizza: Use the dough as a base for scrambled eggs, cooked bacon or sausage, and cheddar cheese. Bake until the eggs are just set.
- Dessert Pizza: After baking, brush the hot crust with melted butter, sprinkle with cinnamon sugar, and finish with dollops of sweetened ricotta and fresh berries.
What to Serve With This Recipe
Wood-fired pizza is a complete meal, but it shines as part of a relaxed gathering. Start with a simple arugula salad dressed with lemon juice, olive oil, and shaved Parmesan for a peppery contrast. For a heartier appetizer, serve marinated olives and roasted nuts.
Beverage pairings are flexible: a crisp Italian lager, a light-bodied Chianti or Sangiovese red wine, or even a sparkling water with lemon all work beautifully. This recipe is perfect for Friday movie nights, casual weekend dinners with friends, or any occasion where you want impressive, shareable food without spending all day in the kitchen.
Storage & Make-Ahead Instructions
- Dough: The shaped dough balls can be refrigerated in oiled, covered containers for up to 3 days, which actually improves flavor. They can also be frozen for up to 3 months; thaw overnight in the fridge before using.
- Leftover Baked Pizza: Store cooled slices in an airtight container in the refrigerator for up to 3 days.
- Reheating: To restore crispness, never use the microwave. Reheat slices directly on the rack of a 375°F (190°C) oven for 5-8 minutes, or in a hot skillet on the stovetop until the bottom is crisp and the cheese is melted.
- Make-Ahead Sauce: The simple tomato sauce can be made and refrigerated up to 5 days in advance.
Frequently Asked Questions
Q: Can I make this without a pizza stone?
A: Yes, but results will differ. Preheat a heavy, rimless baking sheet or cast-iron skillet upside-down in the oven. It won’t hold heat as well as a stone, but it’s a good start.
The crust may be less crisp.
Q: My dough is too sticky to handle. What did I do wrong?
A: This usually means the dough is under-kneaded or the flour measurement was off (hence the scale recommendation). Don’t add more flour during kneading. Instead, wet your hands lightly with water or oil to prevent sticking, and keep kneading—it will become smooth.
Q: Why is my pizza soggy in the middle?
A: The two main culprits are too many wet toppings and a cooking surface that wasn’t hot enough. Ensure your stone preheats for a full 45+ minutes and apply toppings sparingly.
Q: Can I use all-purpose flour?
A: You can, but the crust will be more tender and cake-like, lacking the chewy structure of bread flour or the delicate char of 00 flour. It’s a serviceable substitute in a pinch.
Q: How thin should I stretch the dough?
A: Aim for about 1/8-inch thick in the center, leaving a thicker 1-inch border for the crust. It should be thin enough to see light through it in spots when held up.
Q: My cheese is burning before the crust is done.
A: Your oven heat is likely too high from above. Try moving your stone to a lower rack position or briefly turning on the broiler at the very end of cooking to finish the top.
Q: Can I freeze baked pizza?
A: Yes. Cool completely, wrap individual slices tightly in plastic wrap and foil, and freeze for up to 2 months. Reheat from frozen in the oven.
Final Thoughts
Mastering this wood-fired style pizza is one of the most rewarding skills you can develop in your home kitchen. It demystifies a beloved food and turns it into a customizable, celebratory event. Remember, your first pizza might not be perfect—mine certainly weren’t—but each attempt teaches you about the dough’s feel, the oven’s heat, and the balance of toppings.
The goal isn’t just to make pizza; it’s to create those moments of shared enjoyment around something you crafted with your own hands. So, weigh your flour, heat that stone with patience, and launch your first pie with confidence. I can’t wait for you to experience the crunch, the chew, and the pride that comes with it.
Share your creations with me online, and let me know what your favorite topping combination turns out to be
Authentic Wood-Fired Style Pizza
Ingredients
Equipment
Method
- Make the dough. In a large bowl, combine the warm water and yeast. Let sit for 5 minutes until foamy. Add the flour and salt. Mix with a wooden spoon until a shaggy dough forms. Turn out onto a clean surface and knead for 8-10 minutes until smooth and elastic. Place in a lightly oiled bowl, cover, and let rise at room temperature for 1 hour, or until doubled in size.
- Prepare the sauce. While the dough rises, make the pizza sauce. Crush the San Marzano tomatoes by hand or with a food processor until mostly smooth but with some texture. Stir in the minced garlic, olive oil, and a pinch of salt. Taste and adjust seasoning. This simple, uncooked sauce is key to an authentic flavor.
- Shape the dough. Punch down the risen dough and divide it into 4 equal pieces (about 200g each). On a lightly floured surface, gently shape each piece into a tight ball by tucking the edges underneath. Place the balls on a floured tray, cover with a damp cloth, and let rest for 30 minutes. This relaxes the gluten for easy stretching.
- Preheat your cooking surface. This is the most critical step for a wood-fired effect. If using an oven, place a pizza stone or steel on the top rack and preheat to your oven’s highest temperature (500-550°F / 260-290°C) for at least 45 minutes. If using a grill, prepare it for direct, high heat (around 600°F / 315°C).
- Stretch, top, and bake. Lightly flour a pizza peel or an inverted baking sheet. Gently stretch one dough ball into a 10-12 inch round, leaving a slightly thicker border for the crust. Quickly transfer the base to the peel. Spread a thin layer of sauce, leaving the border bare. Scatter with torn mozzarella. Slide the pizza onto the preheated stone or grill grate. Bake for 4-6 minutes until the crust is puffed and charred in spots and the cheese is bubbly.
- Finish and serve. Immediately remove the pizza from the oven using the peel. Tear fresh basil leaves over the top and drizzle with a little extra virgin olive oil. Let cool for a minute before slicing. Repeat with remaining dough balls, allowing the cooking surface to reheat for a few minutes between pizzas.


