
Strawberry birthday cake aesthetic
There’s something truly magical about a birthday cake that stops the conversation. It’s not just about taste—though that’s paramount—it’s about creating a centerpiece that sparks joy before the first slice is even cut. As a pastry chef, I’ve crafted countless celebration cakes, and the request for a beautiful strawberry cake is one of my favorites.
This recipe is my answer: a cake that delivers a moist, tender crumb infused with the genuine flavor of fresh strawberries, paired with a silky, not-too-sweet frosting, all designed to look effortlessly elegant. It’s the cake you’ll be proud to present and even happier to eat.
- Authentic Strawberry Flavor: We use a generous amount of real strawberry puree in both the cake and frosting, avoiding artificial extracts for a fresh, vibrant taste.
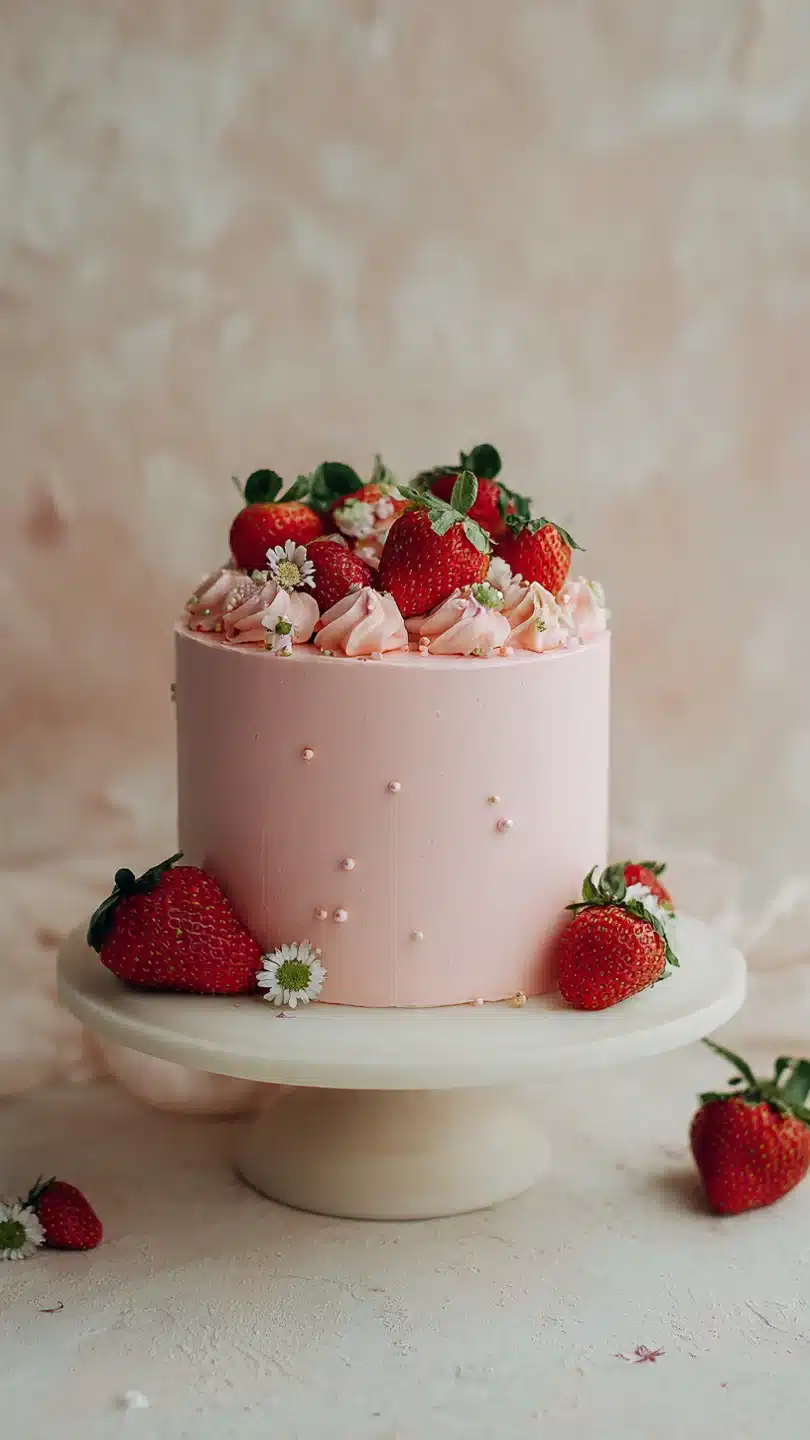
- Stunning Visual Appeal: With its soft pink hue, sharp layers, and artful strawberry garnish, this cake is designed for maximum aesthetic impact perfect for photos and celebrations.
- Professional-Grade Texture: The combination of cake flour, oil, and sour cream creates an exceptionally moist and tender crumb that stays soft for days.
- Less-Sweet Frosting: The Swiss meringue buttercream is luxuriously smooth and silky, providing a beautiful canvas for decorating without the overwhelming sweetness of American buttercream.
- Make-Ahead Friendly: Each component can be prepared in advance, making assembly on the day of your event stress-free and enjoyable.
- Tested & Reliable: Developed and refined through multiple test bakes in a professional kitchen, this recipe provides clear, actionable steps for guaranteed success.
Ingredients You’ll Need
Let’s gather our ingredients. This recipe uses a blend of pantry staples and fresh fruit to build layers of genuine flavor and structure. Using high-quality, room-temperature ingredients is the first secret to a sublime cake texture.
For the cake, cake flour is non-negotiable for its low protein content, which gives us that delicate, tender crumb we associate with perfect birthday cake. You’ll also need fresh strawberries for pureeing—look for ripe, fragrant berries for the best color and taste. Sour cream adds tang and incredible moisture, while vegetable oil ensures the crumb stays soft.
A drop of pink gel food coloring is optional but helps achieve that classic, vibrant pink aesthetic if your berries aren’t intensely red.
For the frosting, we’re making a Swiss meringue buttercream. Don’t let the name intimidate you; it’s a straightforward process that yields a frosting so much easier to work with for smooth sides and beautiful piping. You’ll need egg whites, sugar, and butter as the base, plus a bit of the reserved strawberry puree for flavor and a hint of color.
For garnish, a mix of fresh strawberries and crushed freeze-dried strawberries adds texture, height, and a burst of concentrated strawberry flavor that looks incredibly professional.

Note: You’ll find the complete list of ingredients, along with their exact measurements, in the printable recipe card at the bottom of this post.
Kitchen Equipment Needed
You don’t need a fully stocked bakery, but a few key tools will make the process smoother. A stand mixer is highly recommended for properly creaming the butter and sugar and for whipping the meringue buttercream to the right consistency. You’ll need three 8-inch round cake pans for tall, impressive layers.
A digital kitchen scale is my top tip for baking accuracy—measuring flour by weight guarantees consistent results every time. For assembly, an offset spatula and a bench scraper are essential for achieving those clean, sharp edges and smooth frosting. A candy thermometer ensures the egg whites for the buttercream reach a safe temperature, and a fine mesh strainer is crucial for removing seeds from the strawberry puree, giving both cake and frosting a smooth, elegant texture.
How to Make Strawberry Birthday Cake Recipe
Step 1: Prep and Mix Dry Ingredients
Begin by preheating your oven to 350°F (175°C). Properly preparing your pans is the first step to cakes that release cleanly. Grease the pans, line the bottoms with parchment paper circles, and give them a light dusting of flour.
In a medium bowl, whisk together the cake flour, baking powder, baking soda, and salt. This aerates the dry ingredients and ensures the leaveners are evenly distributed, which is key for an even rise. Trust me, taking this minute to whisk pays off in the final texture of your cake layers.
Step 2: Cream Butter and Sugar
In the bowl of your stand mixer fitted with the paddle attachment, beat the room-temperature butter and granulated sugar together on medium-high speed. You’re not just mixing; you’re incorporating air. Beat for a full 4-5 minutes until the mixture is extremely pale, fluffy, and almost resembles whipped cream.
This step is the foundation for a light cake crumb. Scrape down the bowl and beater to ensure everything is homogeneous before moving on.
Step 3: Build the Cake Batter
With the mixer on low, add the room-temperature eggs one at a time, letting each fully incorporate before adding the next. This prevents the batter from breaking. Mix in the neutral oil and vanilla extract.
Now, you’ll alternate adding the dry ingredient mixture and the combined wet ingredients (sour cream and strained strawberry puree). Start and end with the dry ingredients, mixing on low just until the flour disappears after each addition. Overmixing at this stage develops gluten and leads to a tough cake.
If using, stir in a tiny drop of pink gel coloring for that signature birthday cake look.
Step 4: Bake and Cool Layers
Divide the batter evenly between your three prepared pans. I use a scale here for absolute precision—it guarantees layers of identical height. Tap the pans gently on the counter to release any large air bubbles.
Bake for 25-30 minutes. The cakes are done when they spring back lightly to the touch and a toothpick inserted into the center comes out clean. Let them cool in the pans for just 10 minutes before turning them out onto a wire rack to cool completely.
Once cool, wrap them tightly in plastic wrap and chill for at least an hour. Believe me, cold cake layers are infinitely easier to frost without creating a crumbly mess.
Step 5: Make the Swiss Meringue Buttercream
This is where the magic happens for that professional finish. Combine egg whites and sugar in the impeccably clean bowl of your stand mixer. Place it over a pot of simmering water, whisking constantly until the mixture reaches 160°F (71°C) and the sugar is fully dissolved.
Attach the bowl to the mixer with the whisk attachment and whip on high until you have a glossy, stiff meringue and the bowl is completely cool to the touch. This can take up to 10 minutes—patience is key. Switch to the paddle attachment.
With the mixer on low, add the room-temperature butter one cube at a time. It will look soupy or curdled partway through—keep going! It will suddenly come together into a smooth, silky frosting.
Whip in the salt, vanilla, and the reserved strawberry puree until perfectly combined.
Step 6: Assemble, Frost, and Decorate
Place one chilled cake layer on your cake stand or turntable. Spread with about 3/4 cup of buttercream using an offset spatula. Repeat with the second layer.
Top with the final cake layer. Now, apply a thin “crumb coat” of frosting over the entire cake—this is a preliminary layer that traps any loose crumbs. Chill the cake for 20 minutes to set this coat.
Finally, apply the final, generous layer of frosting. Use your bench scraper held against the side of the cake while spinning the turntable to achieve beautifully smooth sides. Now for the fun part: decorate with halved fresh strawberries, whole berries, and a sprinkle of crushed freeze-dried strawberries for texture and a pop of color.
Step back and admire your stunning creation.
Puree Preparation: For the smoothest cake and frosting, strain your strawberry puree through a fine-mesh sieve to remove all seeds. This gives a more refined texture and a brighter pink color. Room Temperature is Critical: Ensure your butter, eggs, and sour cream are truly at room temperature (about 70°F). This allows for maximum volume when creaming and a smooth, emulsified batter that bakes evenly. Avoid Overbaking: Check your cakes a few minutes before the timer goes off. Overbaked cake layers become dry and can develop a tough crust. The cakes should just spring back when lightly pressed in the center. Buttercream Troubleshooting: If your Swiss meringue buttercream looks curdled after adding the butter, simply keep whipping on medium-high speed. It will almost always come together as the butter emulsifies. If the kitchen is very warm and the frosting seems soupy, chill the bowl for 15 minutes, then re-whip. Sharp Layers: For perfectly level cakes that stack neatly, consider using cake strips (damp fabric strips wrapped around the outside of the pan) during baking. They insulate the edges, promoting an even rise without a domed top.Recipe Variations
- Strawberry Shortcake Style: For a lighter, less formal look, skip the final frosting coat. Use the buttercream only between the layers, and finish the outside of the cake with a simple dusting of powdered sugar and piles of fresh, sliced strawberries.
What to Serve With This Recipe
This strawberry birthday cake is a celebratory centerpiece all on its own. For a classic birthday party spread, pair it with a scoop of high-quality vanilla bean ice cream or a lightly sweetened whipped cream. Beverage pairings include sparkling rosé for adults, which echoes the berry notes, or sparkling lemonade for an all-ages toast.
For a larger dessert table, consider lighter accompaniments like a fresh fruit salad or mini cheesecake bites to offer variety without overwhelming the palate. This cake is ideal for spring and summer celebrations, bridal showers, Mother’s Day, or any occasion that calls for a touch of elegant, fruity sweetness.
Storage & Make-Ahead Instructions
- Storage: The frosted cake can be stored, covered loosely with a cake dome or in a large airtight container, in the refrigerator for up to 3 days. Due to the fresh fruit puree and dairy-based frosting, it should not be left at room temperature for more than 2 hours.
Frequently Asked Questions
Q: Can I use frozen strawberries for the puree?
A: Absolutely. Thaw frozen strawberries completely, drain any excess liquid, and puree. The flavor is excellent, though the color may be slightly less vibrant than with peak-season fresh berries.
Q: My buttercream is too soft and runny. What happened?
A: This is usually due to the butter or the finished meringue being too warm. Place the entire mixing bowl in the refrigerator for 15-20 minutes to firm up the butter, then re-whip. The kitchen environment plays a big role.
Q: Can I make this cake with all-purpose flour instead of cake flour?
A: You can, but the texture will be slightly denser. For a closer substitute, replace 2 tablespoons per cup of all-purpose flour with cornstarch (sift together well) to mimic the lower protein content of cake flour.
Q: How do I get my frosting so white before adding the strawberry puree?
A: The key is a truly clean, grease-free bowl and whisk for the meringue. Any trace of fat (like yolk) can prevent the whites from whipping up to their full, snowy-white volume.
Q: The cake sunk in the middle after baking. Why?
A: This typically indicates underbaking, opening the oven door too early, or possibly an issue with the leavening agents (old baking powder/soda). Ensure your oven is properly preheated and use an oven thermometer for accuracy.
Q: Can I use American buttercream instead?
A: Yes, you can use a simple buttercream (butter, powdered sugar, milk, vanilla). However, it will be much sweeter and can be more difficult to achieve the super-smooth, sharp aesthetic finish that Swiss meringue buttercream provides.
Q: How do I transport this cake safely?
A: Chill the fully decorated cake until the frosting is very firm. Use a cake carrier with a non-slip mat on the bottom. If you don’t have one, place the cake on a cardboard round and set it in a large, clean box for transport.
Drive carefully!
Final Thoughts
Creating a birthday cake that wows both the eyes and the taste buds is one of the most rewarding kitchen projects. This strawberry cake recipe is designed to guide you through that process with confidence, combining professional techniques with accessible steps. The result is more than just a dessert; it’s a edible piece of celebration, layered with real fruit flavor and finished with an elegant, smooth facade.
Whether it’s for a milestone birthday, an anniversary, or simply a Tuesday that needs brightening, this cake is guaranteed to create a special moment. I encourage you to give it a try—embrace the process, trust the steps, and most importantly, have fun decorating. Don’t forget to share your beautiful creations and let me know how it turned out.
Happy baking
Aesthetic Strawberry Birthday Cake
Ingredients
Equipment
Method
- Preheat oven to 350°F (175°C). Grease, line with parchment, and flour three 8-inch round cake pans. In a medium bowl, whisk together the cake flour, baking powder, baking soda, and salt. Set aside.
- In the bowl of a stand mixer fitted with the paddle attachment, beat the room-temperature butter and sugar on medium-high speed for 4-5 minutes until very light and fluffy. Scrape down the bowl. With the mixer on low, add the eggs one at a time, fully incorporating each before adding the next. Mix in the oil and vanilla.
- Alternately add the dry ingredients and the wet ingredients (sour cream and strawberry puree combined) to the butter mixture, beginning and ending with the dry ingredients. Mix on low just until combined after each addition. If using, stir in a drop or two of pink gel color. Divide the batter evenly between the prepared pans.
- Bake for 25-30 minutes, or until a toothpick inserted into the center comes out clean and the cakes spring back when lightly touched. Let cool in pans for 10 minutes, then turn out onto a wire rack to cool completely. Wrap layers in plastic wrap and chill for at least 1 hour before frosting for easier handling.
- For the buttercream, combine egg whites and sugar in the clean bowl of a stand mixer. Place over a pot of simmering water (double boiler), whisking constantly until the sugar dissolves and mixture reaches 160°F (71°C). Attach bowl to mixer with whisk attachment and whip on high until stiff, glossy peaks form and bowl is cool to the touch, about 10 minutes.
- Switch to the paddle attachment. With mixer on low, add the room-temperature butter one cube at a time, waiting until each is incorporated before adding the next. The mixture may look curdled—keep mixing, it will become smooth. Add salt, vanilla, and the 1/4 cup of cooled strawberry puree. Whip on medium-high for 2-3 minutes until silky smooth.
- Place one chilled cake layer on a serving plate or turntable. Spread with about 3/4 cup of buttercream. Repeat with second layer. Top with final cake layer. Apply a thin ‘crumb coat’ of frosting over the entire cake. Chill for 20 minutes. Apply the final, thick layer of frosting, using an offset spatula and bench scraper for smooth sides. Decorate with fresh and crushed freeze-dried strawberries.


