
Pizza dip
There’s something magical about capturing the essence of a favorite food in dip form. It’s shareable, interactive, and always the center of attention. This hot pizza dip does exactly that—it takes everything you love about a loaded pizza and transforms it into a warm, scoopable, utterly addictive appetizer.
I’ve served this at countless gatherings, from casual game days to holiday parties, and the reaction is always the same: an empty dish and requests for the recipe. The combination of a tangy, creamy base, rich pizza sauce, and a blanket of melted cheese creates a flavor and texture experience that feels indulgent yet is surprisingly simple to pull together. Let’s make the ultimate party snack.
- Effortless Entertaining: This recipe requires minimal prep and bakes in one dish, meaning you can spend less time in the kitchen and more time with your guests.
- Maximum Flavor Payoff: Layers of seasoned cream cheese, robust pizza sauce, and melted cheeses create a depth of flavor that far surpasses typical store-bought dips.
- Highly Customizable: The topping layer is your canvas. Use your favorite pizza toppings to make it your own, from veggies to different meats.
- Kid-Friendly Favorite: The familiar, comforting flavors of pizza in a fun, dippable format make this a guaranteed hit with children and adults alike.
- Perfect Make-Ahead Option: You can assemble the entire dip hours before your event and simply pop it in the oven when you’re ready, making party planning a breeze.
- Ideal Texture: The cream cheese base ensures the dip stays creamy and scoopable even as it cools, avoiding the rubbery texture that can plague all-cheese dips.
Ingredients You’ll Need
Let’s gather our ingredients—this is where simple pantry staples come together to create pure magic. Using quality ingredients here makes a noticeable difference. For the cream cheese, I always recommend full-fat for the creamiest, most stable result.
Trust me, the low-fat versions can lead to a watery dip. A good jarred pizza sauce or a simple marinara works perfectly; just give it a taste first to ensure it’s well-seasoned. For the cheeses, pre-shredded bags are convenient, but if you have an extra minute, grating a block of mozzarella yourself will give you a superior melt without the anti-caking agents.
The mini pepperoni are not just cute—their size ensures you get a bit of that spicy, savory flavor in every bite. Don’t skip the garnishes; the fresh green onions add a necessary pop of color and a slight sharpness that cuts through the richness beautifully.

Note: You’ll find the complete list of ingredients, along with their exact measurements, in the printable recipe card at the bottom of this post.
Kitchen Equipment Needed
You don’t need any special equipment for this recipe, which is part of its charm. A standard 9-inch pie dish, 8×8 baking dish, or a 10-inch oven-safe skillet is perfect. I often use my cast iron skillet because it retains heat beautifully, keeping the dip warm at the table longer.
You’ll need a medium mixing bowl and a hand mixer or a very sturdy spatula to beat the cream cheese base until it’s completely smooth—lumps in the base layer are the only technical flaw to avoid. Of course, have your measuring cups and spoons ready. If you want to get fancy for serving, a trivet or a wooden board to place the hot dish on is both practical and stylish.
How to Make Pizza Dip Recipe
Step 1: Create the Creamy Foundation
Start by preheating your oven to 350°F (175°C). This moderate temperature allows the dip to heat through evenly without burning the top. In your mixing bowl, combine the softened cream cheese, sour cream, Italian seasoning, garlic powder, and onion powder.
Believe me, taking the time to let your cream cheese soften on the counter is non-negotiable; cold cream cheese will never blend smoothly. Use a hand mixer on medium speed for about 60 seconds, or a lot of elbow grease with a spatula, until the mixture is utterly smooth and no streaks remain. This creamy, seasoned layer is the flavor anchor of the entire dip.
Step 2: Build the Base Layer
Now, transfer your perfectly smooth cream cheese mixture into your chosen baking dish. Use the back of a spoon or a small offset spatula to spread it into a uniform, even layer that completely covers the bottom of the dish. Tip from me: make sure this layer is smooth and reaches the edges.
This creates a sealed base that prevents the pizza sauce from seeping down and making the bottom soggy. You’re essentially building a flavorful barrier.
Step 3: Add the Pizza Heart
Here comes the fun part—adding the pizza essence! Carefully spoon your pizza sauce over the cream cheese layer. Gently spread it with the back of the spoon to cover the white layer completely, right to the edges.
Then, sprinkle half of your mozzarella and half of your Parmesan cheese evenly over the sauce. This initial cheese layer acts as a glue, helping to hold the upcoming toppings in place and ensuring every scoop gets plenty of cheesy goodness.
Step 4: Top and Finish the Cheese Blanket
Scatter your mini pepperoni and black olives (if using) evenly over the cheese. Now, blanket everything with the remaining mozzarella and Parmesan. This top cheese layer is what will become beautifully golden and bubbly in the oven.
Don’t skimp here—an even, generous covering of cheese is key to that iconic pizza-dip look and the satisfying cheese pull.
Step 5: Bake, Rest, and Serve
Place your assembled dish into the preheated oven. Bake for 18 to 22 minutes. You’re looking for the edges to be actively bubbling and the cheese on top to be fully melted with a few golden-brown spots.
Trust me, pulling it out right when the edges are lively but before the top cheese browns too much is perfect. Let the dip rest on a cooling rack for a full 5 minutes. This brief rest allows the layers to set just enough so your first scoop is clean and beautiful.
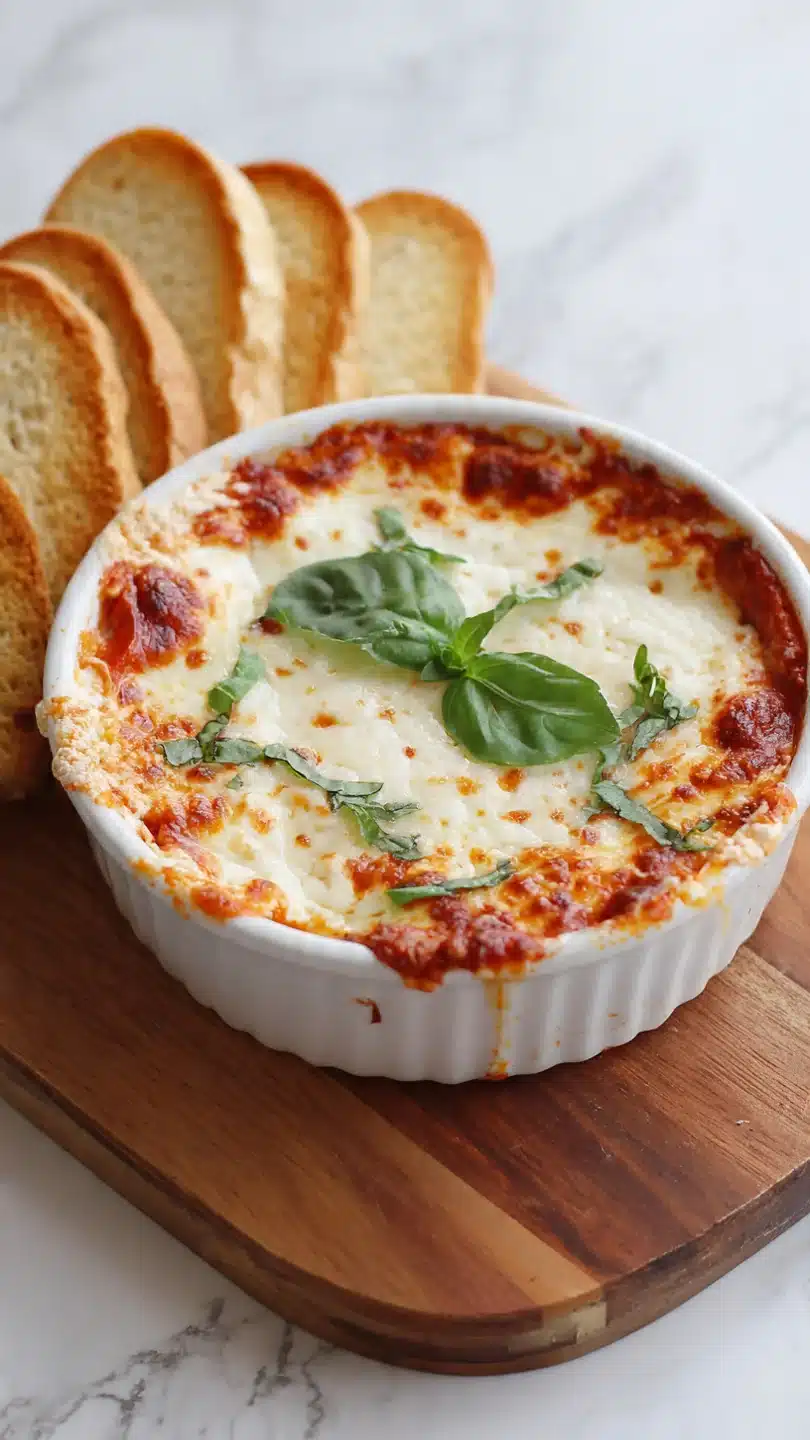
Garnish with sliced green onions, place it in the center of the table with your favorite dippers, and watch it disappear.
- Room Temperature is Key: Ensuring your cream cheese and sour cream are at true room temperature (out for 60-90 minutes) is the single most important tip for a lump-free, silky base. Cold dairy will never incorporate smoothly.
- Baking Vessel Matters: The material of your dish affects cooking time. Glass or ceramic dishes may require the full 22 minutes, while a metal skillet or pan will heat faster, so start checking at 18 minutes.
- The Bubble Test: The visual cue for doneness is bubbling around the perimeter. If the center isn’t bubbling but the edges are, it’s done—the center will continue to cook from residual heat as it rests.
- Avoid Overmixing the Meat: When adding pepperoni, just scatter it. If you stir it into the cheese, the oils can seep out and make the top greasy.
- Preventing a Greasy Top: If using a higher-fat meat like sausage, consider browning and draining it very well before adding it as a topping to prevent excess oil pooling on your beautiful cheese layer.
Recipe Variations
- Supreme Style: Add a layer of finely diced green bell pepper, red onion, and sliced mushrooms between the sauce and the first cheese layer for a loaded vegetable version.
- White Pizza Dip: Omit the red pizza sauce. Mix a tablespoon of minced garlic into the cream cheese base and use a combination of ricotta, mozzarella, and Parmesan for the layers. Top with cooked, crumbled Italian sausage.
- Spicy Arrabbiata: Use a spicy arrabbiata sauce instead of plain pizza sauce and mix 1/4 teaspoon of crushed red pepper flakes into the cream cheese base. Top with spicy Italian sausage or jalapeño slices.
- Hawaiian Twist: Substitute the pepperoni with diced ham and add a layer of well-drained, crushed pineapple over the sauce before adding the cheese. The sweet and savory combo is fantastic.
- Breakfast Pizza Dip: Transform it for brunch! Use a creamy sausage gravy as the middle layer instead of pizza sauce, and top with scrambled crumbled bacon and cheddar cheese.
- Veggie Lover’s: Skip the meat entirely and load it up with sautéed spinach (squeezed dry), artichoke hearts, and sun-dried tomatoes for a spin on hot spinach-artichoke dip.
- Gluten-Free & Keto: This dip is naturally low-carb. Simply serve it with keto-friendly dippers like pork rinds, sliced bell peppers, cucumber rounds, or flaxseed crackers.
What to Serve With This Recipe
This dip is the star, so your dippers should be sturdy, neutral canvases. Toasted baguette slices are my absolute favorite—their crunch holds up perfectly. Garlic breadsticks or soft pretzel bites are also phenomenal for soaking up every last bit.
For a lighter option, offer crisp bell pepper strips, cucumber rounds, or endive leaves. In terms of a full menu, this dip pairs wonderfully with other finger foods like buffalo chicken wings, a crisp vegetable crudité platter, and a simple green salad to balance the richness. For beverages, a cold, hoppy IPA or a crisp lager complements the savory flavors, while a non-alcoholic sparkling lemonade works for all ages.
Storage & Make-Ahead Instructions
- Storage: Store any leftover dip in an airtight container in the refrigerator for up to 4 days.
- Reheating: Reheat gently in the microwave at 50% power in 30-second intervals, stirring in between, until warm. For best results, reheat in a 300°F oven for 10-15 minutes, covered with foil to prevent over-browning.
- Freezing: I do not recommend freezing the fully assembled and baked dip, as the cream cheese and dairy base can separate and become grainy upon thawing.
- Make-Ahead: You can assemble the dip completely (through Step 4) up to 24 hours in advance. Cover tightly with plastic wrap and refrigerate. When ready to serve, bake straight from the fridge, adding 5-7 minutes to the baking time.
Frequently Asked Questions
Q: Can I make this dip ahead of time and bake it later?
A: Absolutely. Assemble the dip completely, cover it tightly, and refrigerate for up to 24 hours. Bake it straight from the refrigerator, adding 5-7 extra minutes to the cook time to account for it being cold.
Q: My cream cheese mixture is lumpy. What did I do wrong?
A: This almost always means your cream cheese wasn’t soft enough. To fix it, let the mixture sit at room temperature for 20 minutes, then beat it vigorously again. For next time, ensure your cream cheese is truly soft by leaving it out for 1-2 hours.
Q: Can I use a different cheese besides mozzarella?
A: Yes! Provolone, fontina, or a mild white cheddar are excellent substitutes. I recommend keeping at least half mozzarella for its classic melt and stretch.
Q: What’s the best way to reheat leftovers without drying it out?
A: The oven is best. Place leftovers in an oven-safe dish, add a splash of milk or cream, cover with foil, and heat at 300°F for 10-15 minutes until warmed through. The foil and added liquid create a steamy environment.
Q: Can I make this in a slow cooker?
A: You can, but the texture will be softer. Mix all layers except the final cheese topping in the slow cooker insert. Cook on LOW for 2 hours, stirring once halfway.
Add the final cheese topping, cover until melted, and serve.
Q: Is it necessary to let the dip rest after baking?
A: Yes, those 5 minutes are crucial. It allows the molten cheese and sauce to settle, making the dip easier to scoop without everything sliding off your dipper. It also prevents burnt mouths!
Q: Can I double this recipe for a larger crowd?
A: Definitely. Double all ingredients and bake it in a 9×13 inch baking dish. The baking time will increase slightly; start checking at 25 minutes for those bubbling edges.
Final Thoughts
This hot pizza dip is more than just a recipe; it’s a guaranteed success formula for any gathering. It embodies what I love most about cooking: taking simple, accessible ingredients and through a bit of thoughtful layering, creating something that brings people together and sparks joy. The process is straightforward, the customization options are endless, and the result is always met with enthusiasm.
I encourage you to make it your own—try the spicy variation, load it with your favorite veggies, or keep it classic. Once you see how quickly it vanishes, you’ll understand why it’s a permanent fixture in my entertaining repertoire. Give it a try this weekend, and don’t forget to come back and let me know how it turned out.
Happy dipping
Hot Pizza Dip
Ingredients
Equipment
Method
- Preheat your oven to 350°F (175°C). In a medium bowl, combine the softened cream cheese, sour cream, Italian seasoning, garlic powder, and onion powder. Use a hand mixer or a sturdy spatula to beat until completely smooth and creamy. This is your flavorful base layer.
- Spread the creamy cheese mixture evenly into the bottom of a 9-inch pie dish, oven-safe skillet, or similar baking dish. Use the back of a spoon to create a smooth, even layer that covers the entire bottom.
- Carefully spoon the pizza sauce over the cream cheese layer, spreading it gently to cover completely. Sprinkle half of the mozzarella and half of the Parmesan cheese evenly over the sauce.
- Scatter the mini pepperoni and black olives (if using) over the cheese layer. Top with the remaining mozzarella and Parmesan cheese. This creates the perfect cheesy, golden crust.
- Bake for 18-22 minutes, or until the dip is hot and bubbly around the edges and the cheese on top is fully melted and just starting to turn golden in spots. Let it cool for 5 minutes before garnishing with green onions and serving.


