
Strawberry heart cake
There’s something undeniably special about a homemade cake shaped like a heart. It’s more than just dessert; it’s an edible hug, a tangible expression of love that feels both nostalgic and celebratory. As a pastry chef, I’ve made countless fancy desserts, but the delighted reaction to a beautifully presented heart-shaped cake never gets old.
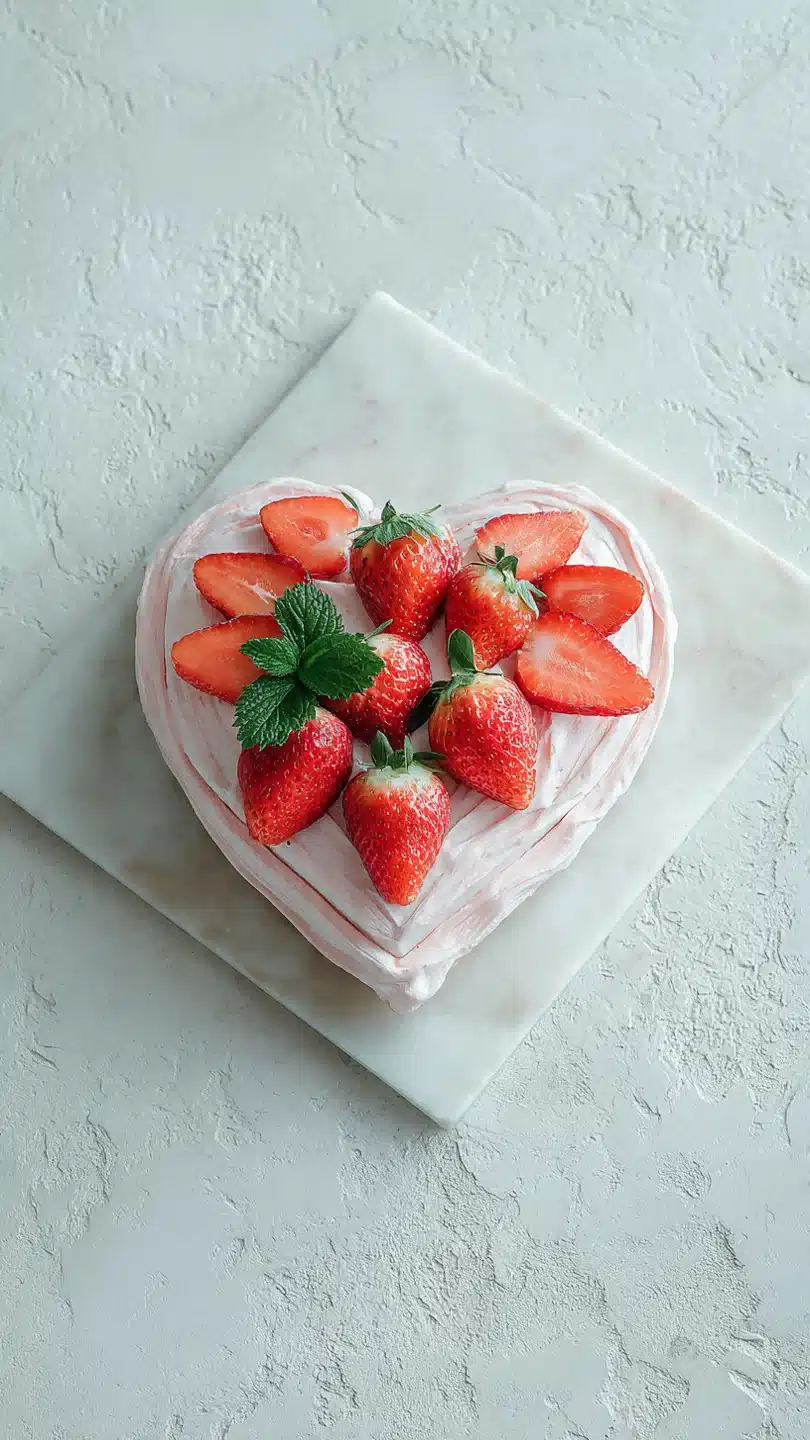
This Strawberry Heart Cake is my go-to for Valentine’s Day, anniversaries, or simply a “just because” gesture. It features a tender, moist vanilla cake that’s sturdy enough to hold its shape, paired with a buttercream that truly tastes of fresh strawberries—not just pink food coloring. The result is a stunning, romantic centerpiece that’s surprisingly achievable in your own kitchen.
Let’s bake some love.
- Professional Presentation: This cake looks like it came from a boutique bakery but is made entirely in your kitchen. The heart shape and fresh strawberry garnish create instant wow factor.
- Real Strawberry Flavor: Unlike many recipes that rely on jam or extract, we reduce a fresh strawberry puree to concentrate its flavor and color, giving the buttercream a vibrant taste and natural pink hue.
- Moist, Tender Crumb: Using buttermilk and the classic creaming method ensures a cake that stays deliciously soft for days, never dry or crumbly.
- Perfect for Celebrations: While ideal for Valentine’s Day, this versatile cake is a hit for birthdays, Mother’s Day, bridal showers, or any occasion that calls for a touch of sweetness and romance.
- Make-Ahead Friendly: Both the cake layers and the buttercream can be prepared a day in advance, making assembly on the day you plan to serve it stress-free and enjoyable.
Ingredients You’ll Need
Let’s gather our ingredients—this is where the magic starts. Using quality components and preparing them correctly is the secret to bakery-quality results at home. For the cake, we’re building flavor and structure with butter, sugar, and buttermilk for tangy tenderness.
The star, of course, is the fresh strawberries. Seek out ripe, fragrant berries for the puree; their natural sweetness and color are irreplaceable. If they’re slightly out of season, don’t worry—the reduction process will intensify their flavor beautifully.
- All-Purpose Flour: The foundation of our cake. Be sure to spoon it into your measuring cup and level it off for accuracy—scooping directly can pack in too much flour.
- Baking Powder & Baking Soda: Our dual leavening agents. The baking soda reacts with the acidic buttermilk for a good rise.
- Unsalted Butter: You’ll need it for both the cake and the buttercream. Room temperature is non-negotiable for proper creaming and a smooth frosting.
- Buttermilk: This is the key to a supremely moist crumb and slight tang. No buttermilk? Make a DIY version by adding 1 tablespoon of lemon juice or white vinegar to 1 cup of milk and letting it sit for 5 minutes.
- Fresh Strawberries: We’ll puree and cook them down for the buttercream. This step removes excess water, preventing a runny frosting and giving us potent strawberry essence.
- Powdered Sugar: For the buttercream. Sifting it is highly recommended to avoid lumps in your silky-smooth frosting.

Note: You’ll find the complete list of ingredients, along with their exact measurements, in the printable recipe card at the bottom of this post.
Kitchen Equipment Needed
You don’t need a fully stocked pastry kitchen, but a few key tools will make the process smoother. The most specific item is, of course, the heart-shaped cake pans. I recommend two 8-inch pans for nice, substantial layers.
A stand mixer is incredibly helpful for creaming the butter and sugar to the right lightness and for whipping the buttercream, but a sturdy hand mixer will work too. For assembly, an offset spatula is your best friend for frosting, and a serrated knife is perfect for leveling the cake tops if they dome slightly. Don’t forget parchment paper to ensure your beautiful heart shapes release cleanly from the pans.
How to Make Strawberry Heart Cake Recipe
Step 1: Prep and Mix the Dry Ingredients
Begin by preheating your oven to 350°F (175°C). Proper temperature is crucial for even baking. Take your heart-shaped pans, butter them generously, and line the bottoms with parchment paper traced to the shape—this guarantees a flawless release.
In a medium bowl, whisk together the flour, baking powder, baking soda, and salt. Whisking by hand for a full minute does more than just mix; it aerates the dry ingredients, contributing to a lighter cake texture. Set this bowl aside while you work on the wet ingredients.
Step 2: Cream the Butter and Sugar
This step is the soul of a tender cake. In your stand mixer bowl, combine the room-temperature butter and granulated sugar. Beat them on medium-high speed for a full 4 to 5 minutes.
Trust me, don’t rush this. You’re looking for the mixture to become very pale, almost white, and extremely fluffy. This process incorporates tiny air bubbles that will expand in the oven, giving you a soft, fine crumb.
Scrape down the bowl halfway through to ensure everything is evenly mixed.
Step 3: Incorporate Eggs and Build the Batter
With the mixer on medium, add the eggs one at a time, beating well after each addition until fully incorporated before adding the next. This prevents the batter from breaking or curdling. Mix in the vanilla extract.
Now, with the mixer on its lowest speed, you’ll add the dry ingredients and buttermilk. Tip from me: add the flour mixture in three parts, alternating with the buttermilk in two parts, starting and ending with the dry ingredients. Mix just until the last streaks of flour disappear—overmixing now will lead to a tough cake.
Step 4: Bake and Cool the Layers
Divide the batter evenly between your prepared pans. I like to use a kitchen scale for precision, but you can also eyeball it. Smooth the tops with a spatula.
Bake for 28 to 32 minutes. The cakes are done when they spring back lightly to the touch and a toothpick inserted into the center comes out clean. Let them cool in the pans for exactly 10 minutes—this allows them to set slightly.
Then, carefully turn them out onto a wire rack, peel off the parchment, and let them cool completely. Believe me, frosting a warm cake is a recipe for a melted, sliding mess.
Step 5: Create the Strawberry Buttercream
While the cakes cool, make the star of the show. Puree your hulled strawberries until smooth, then cook them in a small saucepan over medium heat. You want to simmer and reduce them to about 1/3 cup; this concentrates the flavor and removes water that would thin out your frosting.
Let this reduction cool completely. In a clean mixer bowl, beat the remaining butter until creamy. Gradually add the sifted powdered sugar and salt, then pour in the cool strawberry reduction.
Whip on medium-high for 3-4 minutes until the frosting is very light, fluffy, and a beautiful pale pink.
Step 6: Assemble, Frost, and Garnish
Now comes the satisfying part. Place one completely cool cake layer on your serving plate. Spread about 1 cup of buttercream evenly over the top.
Gently place the second layer on top. For a clean, professional look, apply a thin “crumb coat”—a light layer of frosting that seals in any loose crumbs. Chill the cake for 15 minutes to set this coat.
Finally, use the remaining buttercream to frost the entire cake smoothly. Use your offset spatula to create pretty swoops or a smooth finish. Garnish the top with fresh strawberry slices.
Step back and admire your gorgeous, heartfelt creation.
- Room Temperature is Key: Your butter, eggs, and buttermilk must be at room temperature (about 70°F). Cold ingredients won’t emulsify properly, leading to a dense cake or grainy, separated buttercream. Take them out at least an hour before baking.
- Reduce the Puree Thoroughly: The most common issue with fruit buttercreams is being too soft. Cooking the puree until it’s thick and jam-like is essential. It should coat the back of a spoon without immediately dripping off.
- The Crumb Coat is Your Friend: Don’t skip the initial thin coat of frosting and the short chill. This simple step traps all the loose crumbs, ensuring your final layer of buttercream is flawlessly smooth and crumb-free.
- How to Fix Soft Buttercream: If your kitchen is warm and the frosting seems too soft to hold its shape, don’t add more sugar right away. Simply chill the mixing bowl in the refrigerator for 15-20 minutes, then re-whip. This often fixes the issue without making the frosting overly sweet.
Recipe Variations
- Chocolate Strawberry Heart Cake: Replace 1/2 cup of the all-purpose flour in the cake with 1/2 cup of unsweetened cocoa powder for a chocolate version. The rich chocolate pairs wonderfully with the strawberry frosting.
- Lemon Strawberry Cake: Add the zest of two lemons to the cake batter and use lemon juice instead of buttermilk for a bright, citrusy twist that cuts through the sweetness.
- Dairy-Free/Vegan Adaptation: Use a high-quality vegan butter stick and plant-based milk mixed with vinegar for the buttermilk. For the eggs, a commercial egg replacer or flax eggs work well in this recipe.
- Mixed Berry Buttercream: Substitute half of the strawberries with raspberries or blackberries for a deeper, more complex berry flavor and a stunning magenta color.
- Almond Extract: Add 1/2 teaspoon of almond extract to the cake batter along with the vanilla for a subtle, classic flavor pairing with strawberry.
- “Naked Cake” Style: For a rustic, trendy look, apply a very thin layer of buttercream, allowing the cake layers to show through. Simply fill between the layers and do a scant coating on the sides.
What to Serve With This Recipe
This Strawberry Heart Cake is a celebration in itself, but it can be part of a beautiful menu. For a romantic dinner, serve it after a main course like herb-crusted rack of lamb or seared scallops. It pairs exquisitely with a glass of demi-sec Champagne, Prosecco, or a late-harvest Riesling, where the wine’s sweetness complements the berries.
For a more casual gathering, offer it alongside a pot of freshly brewed coffee or a selection of herbal teas. If you’re creating a dessert table, consider lighter accompaniments like fresh fruit skewers or a small cheese plate to balance the sweetness.
Storage & Make-Ahead Instructions
- Storage: Because of the fresh fruit in the buttercream, this cake must be stored in the refrigerator. Place it in a cake carrier or loosely tent it with plastic wrap (use toothpicks to keep the wrap from touching the frosting). It will keep beautifully for up to 3 days.
- Serving Tip: For the best texture and flavor, remove the cake from the refrigerator about 1 hour before you plan to serve it. This allows the buttercream to soften and the cake to come to a perfect, tender room temperature.
- Make-Ahead: You can bake the cake layers up to 2 days in advance. Once completely cool, wrap them tightly in plastic wrap and store at room temperature. The reduced strawberry puree and buttercream can be made 1 day ahead; store the puree in the fridge and the buttercream in an airtight container. Let the buttercream come to room temperature and re-whip briefly before using.
- Freezing: Unfrosted cake layers freeze exceptionally well. Wrap them individually in plastic wrap and then in foil. Freeze for up to 2 months. Thaw overnight in the refrigerator before frosting.
Frequently Asked Questions
Q: Can I use frozen strawberries for the buttercream?
A: Absolutely. Thaw them completely and drain any excess liquid before pureeing. The reduction step is even more important here, as frozen berries often release more water.
Q: My heart-shaped pans are 9-inch. Will this recipe still work?
A: Yes, but your layers will be slightly thinner and may bake 2-3 minutes faster. Keep a close eye on them and test for doneness a bit earlier.
Q: Why did my buttercream turn out runny?
A: This is almost always due to the strawberry puree being too warm or not reduced enough. Ensure it’s cooked to a thick consistency and is completely cool before adding it to the butter. If it’s already runny, you can try beating in more sifted powdered sugar, a 1/4 cup at a time.
Q: Can I make this into cupcakes instead?
A: Definitely! This batter will make about 24 standard cupcakes. Bake at the same temperature for 18-22 minutes.
You’ll have enough buttercream to frost them all generously.
Q: I don’t have heart-shaped pans. Can I still make this cake?
A: Yes! Use two 8-inch or 9-inch round pans. Once the cakes are cooled, you can carefully carve them into a heart shape using a template or by eye.
Save the cake scraps for a trifle!
Q: How do I get my buttercream so pink without food coloring?
A: The color comes entirely from reducing the strawberry puree. The longer you cook it, the deeper and more concentrated the color becomes. For a more vibrant pink, you can add a tiny drop of gel food coloring, but it’s usually not necessary with good, ripe berries.
Q: The cake sunk in the middle. What happened?
A: This typically indicates the cake was underbaked, the oven door was opened too early, or there was too much leavener. Ensure your baking powder and soda are fresh, and use an oven thermometer to verify your oven’s temperature is accurate.
Final Thoughts
Creating this Strawberry Heart Cake is a rewarding baking project that yields a dessert as delightful to make as it is to eat. It combines fundamental baking techniques—proper creaming, careful mixing, and thoughtful frosting—into a result that feels truly special. Remember, the heart shape is a symbol, but the real magic is in the care you put into it.
Whether it’s for a loved one or a treat for yourself, this cake is a testament to the joy of homemade baking. I hope this recipe gives you the confidence to create a stunning dessert that will be remembered long after the last crumb is gone. If you make it, I’d love to hear how it turned out!
Share your creations online and tag me. Happy baking
Strawberry Heart Cake
Ingredients
Equipment
Method
- Preheat oven to 350°F (175°C). Generously butter two 8-inch heart-shaped cake pans and line the bottoms with parchment paper. In a medium bowl, whisk together the flour, baking powder, baking soda, and salt. Set aside.
- In the bowl of a stand mixer fitted with the paddle attachment, beat the 1 cup of butter and granulated sugar on medium-high speed for 4-5 minutes until very light and fluffy. Scrape down the bowl. Add eggs one at a time, beating well after each addition. Beat in the vanilla extract.
- With the mixer on low, add the dry ingredients in three additions, alternating with the buttermilk in two additions, beginning and ending with the dry ingredients. Mix just until combined. Divide the batter evenly between the prepared pans and smooth the tops.
- Bake for 28-32 minutes, or until a toothpick inserted into the center comes out clean. Let cakes cool in pans for 10 minutes, then turn out onto a wire rack to cool completely. Level the tops with a serrated knife if needed.
- For the buttercream, reduce the strawberry puree in a small saucepan over medium heat until it measures about 1/3 cup and has thickened slightly. Cool completely. In a clean mixer bowl, beat the 1 1/2 cups butter until creamy. Gradually add 5 cups of powdered sugar and salt, then the cooled puree. Beat for 3-4 minutes until very fluffy, adding more sugar if needed.
- Place one cake layer on a serving plate. Spread with about 1 cup of buttercream. Top with the second layer. Apply a thin ‘crumb coat’ of buttercream over the entire cake and chill for 15 minutes. Frost the cake with the remaining buttercream. Garnish with fresh strawberry slices.


