
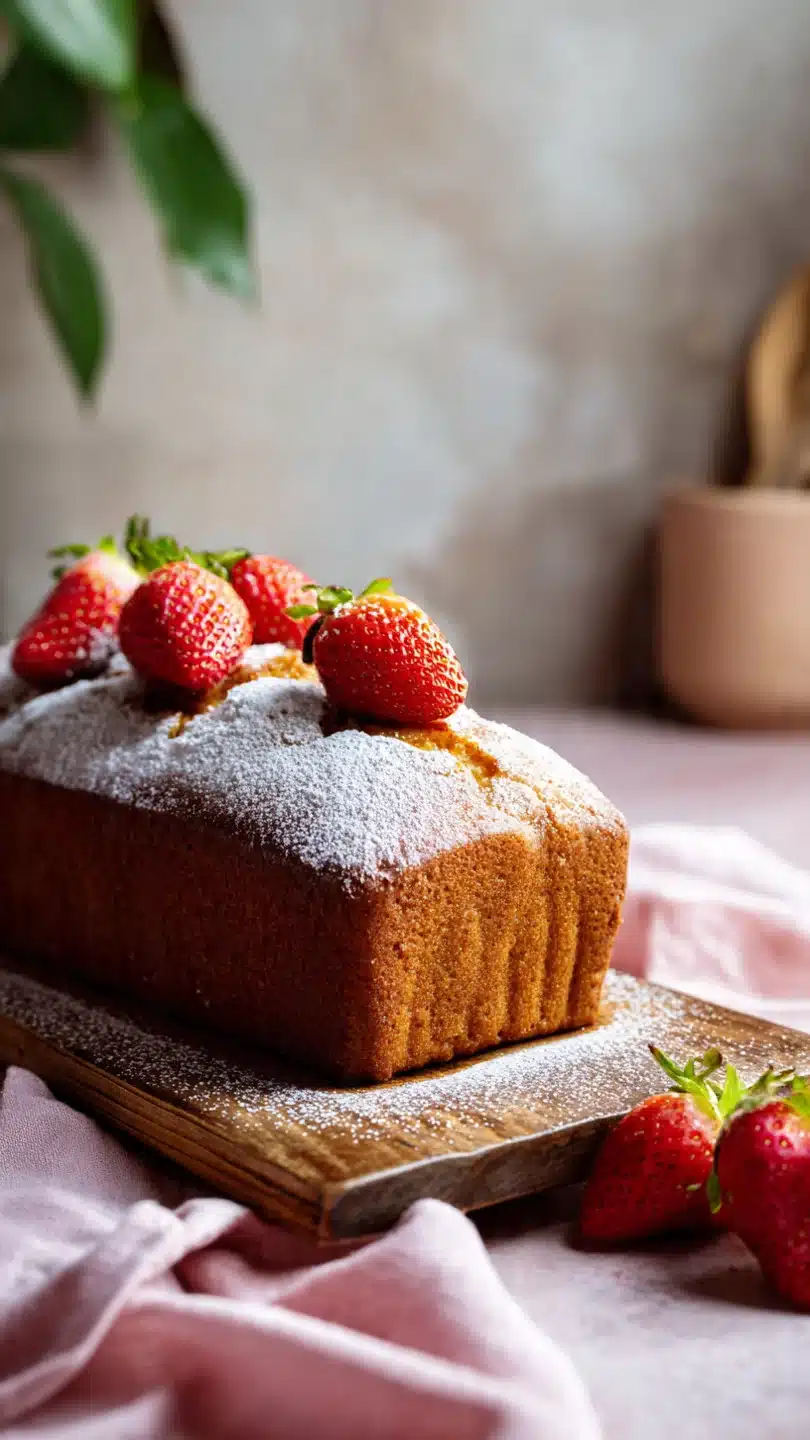
Strawberry loaf cake
There’s something incredibly satisfying about a simple loaf cake. It’s humble, comforting, and promises a slice of homemade goodness with minimal fuss. This strawberry loaf cake is my spring and summer staple—a recipe I’ve refined over years to achieve the perfect balance of sweet, tender crumb and bursts of juicy, tart berry.
It’s the kind of cake that fills your kitchen with a warm, inviting aroma and disappears quickly from the counter. Whether you’re a seasoned baker or just starting out, this one-bowl wonder delivers professional results every time, creating a moist, flavorful cake that celebrates the season’s best fruit.
- One-Bowl Simplicity: This recipe minimizes cleanup by mixing everything in a single bowl, making the process quick and straightforward.
- Incredibly Moist Crumb: The combination of oil and sour cream ensures this cake stays supremely moist and tender for days, never drying out.
- Bursting with Berry Flavor: Using fresh, diced strawberries distributes pockets of juicy flavor throughout every single slice.
- Perfect for Any Occasion: It’s equally suited for a casual breakfast, an afternoon snack with tea, or a simple dessert topped with whipped cream.
- Kid-Friendly & Crowd-Pleasing: The sweet, fruity flavor and soft texture make this a universal hit with both children and adults.
- Easy to Customize: The base recipe is a fantastic canvas for adding different fruits, citrus zests, or spices to match your mood.
Ingredients You’ll Need
Let’s gather our ingredients—this recipe turns simple pantry staples and fresh fruit into something truly special. Using room-temperature eggs is a small detail with a big impact; it helps them emulsify seamlessly with the oil and sugar, creating a smoother, more stable batter. For the strawberries, look for ripe, fragrant berries.
If they’re a bit tart, your cake will have a wonderful balance; if they’re very sweet, the result is purely decadent. The tablespoon of flour used to toss the berries is your secret weapon—it coats the fruit, absorbing excess juice and preventing a soggy bottom or sinking fruit. Sour cream is my preferred dairy here for its rich tang and fat content, but full-fat plain yogurt works beautifully in a pinch.

Note: You’ll find the complete list of ingredients, along with their exact measurements, in the printable recipe card at the bottom of this post.
Kitchen Equipment Needed
You don’t need any specialty tools for this recipe. A standard 9×5-inch metal loaf pan is ideal. I highly recommend lining it with parchment paper; the overhang acts as a sling, making it effortless to lift the baked cake out without risking a break.
A large mixing bowl, a whisk, and a flexible spatula are your main players. A wire cooling rack is essential for allowing air to circulate around the loaf, preventing the bottom from becoming steamy and soggy as it cools. If you want to ensure perfect doneness, a digital instant-read thermometer is helpful—the cake is done when the internal temperature reaches about 205°F (96°C).
How to Make Strawberry Loaf Cake Recipe
Step 1: Prep Your Pan and Dry Ingredients
Start by preheating your oven to 350°F (175°C). Proper heat from the moment the batter goes in is key for a good rise. Grease your loaf pan and line it with a parchment paper sling.
This isn’t just for easy cleanup; it guarantees you can remove the delicate, fruit-studded cake intact. In a separate bowl, whisk together your flour, baking powder, baking soda, and salt. Whisking aerates the dry ingredients and ensures the leaveners are evenly distributed, which is the foundation for an even bake.
Set this aside while you work on the wet ingredients.
Step 2: Create the Wet Batter Base
In your large mixing bowl, combine the sugar, room-temperature eggs, sour cream, neutral oil, and vanilla. Now, whisk with conviction! You want to whisk for a full 1-2 minutes until the mixture is completely homogenous, slightly pale, and has a smooth, thickened consistency.
Trust me, this vigorous whisking is what emulsifies the oil and eggs, creating a stable base that will hold the berries and give you a fine, tender crumb rather than a greasy one.
Step 3: Combine and Add the Berries
Add your pre-whisked dry ingredients to the wet batter. Using your spatula, gently fold them together. The goal is to mix until you no longer see any dry flour streaks, but not a stroke more.
Overmixing at this stage develops the gluten in the flour, leading to a tough, dense cake. In a small bowl, toss your diced strawberries with that single tablespoon of flour. This light coating is a professional baker’s trick—it helps suspend the berries in the batter so they don’t all sink to the bottom during baking.
Step 4: Bake to Golden Perfection
Gently fold the floured strawberries into the batter until they’re evenly distributed. Pour the thick, speckled batter into your prepared pan and smooth the top. For a beautiful finish, thinly slice a couple of extra strawberries and arrange them on top; they’ll caramelize slightly as they bake.
Place the pan in the center of your preheated oven. Now comes the hardest part: resisting the urge to open the oven door for at least the first 45 minutes. A steady temperature is crucial for an even rise.
Step 5: Cool, Slice, and Serve
Bake for 55 to 65 minutes. The cake is done when it’s golden brown on top, springs back lightly to the touch, and a toothpick inserted into the center comes out clean or with a few moist crumbs—not wet batter. Believe me, letting this cake cool is critical.
Allow it to rest in the pan for 15 minutes, then use the parchment paper to lift it onto a wire rack. Let it cool completely before slicing. This patience allows the structure to set, giving you neat, perfect slices that showcase all those beautiful berry pockets.
- Berry Selection & Prep: For the best texture, use fresh, in-season strawberries. Hull and dice them into 1/4-inch pieces. If using frozen berries, do not thaw them first; toss them directly from the freezer in flour to minimize color bleeding.
- The Flour Coat is Non-Negotiable: Tossing the berries in flour is the single most important tip for preventing a soggy, sunken layer of fruit at the bottom of your loaf. It creates a light barrier between the juicy berry and the batter.
- Don’t Overmix: Once you add the flour to the wet ingredients, switch from a whisk to a spatula and fold gently. Mix just until the last streak of flour disappears. A few small lumps are far better than an overworked batter.
- Testing for Doneness: Ovens vary. Start checking at 55 minutes. The toothpick test is reliable, but for absolute certainty, an internal temperature of 205°F (96°C) means your cake is perfectly baked and will be moist, not underdone.
- Cooling is Part of Baking: Cutting into a warm cake will cause it to crumble and seem underbaked. The cooling process allows the starches to set, giving you that perfect, sliceable texture.
Recipe Variations
- Lemon Strawberry: Add the zest of one lemon to the wet ingredients for a bright, citrusy twist that complements the berries beautifully.
- Almond Streusel: Before baking, top the batter with a mixture of 1/4 cup flour, 1/4 cup brown sugar, 2 tbsp melted butter, and 1/4 cup sliced almonds for a crunchy, sweet topping.
- Mixed Berry Bliss: Substitute half of the strawberries with an equal amount of raspberries or blueberries for a multi-berry flavor explosion.
- Gluten-Free Adaptation: Use a 1:1 gluten-free all-purpose flour blend. The result will be slightly more delicate but still delicious.
- Cream Cheese Swirl: Before adding the berries, drop spoonfuls of sweetened cream cheese mixture (4 oz cream cheese, 1/4 cup sugar, 1 egg yolk) onto the batter and swirl with a knife.
- Vegan Version: Use a flax egg (1 tbsp ground flax + 3 tbsp water per egg) and replace the sour cream with an equal amount of dairy-free yogurt or vegan sour cream.
What to Serve With This Recipe
This strawberry loaf cake is wonderfully versatile. For a simple afternoon tea, serve a slice alongside a cup of Earl Grey or a fragrant herbal tea. As a dessert, elevate it with a dollop of freshly whipped cream, a scoop of vanilla bean ice cream, or a drizzle of strawberry sauce.
It makes a lovely addition to a brunch spread, paired with quiche, fresh fruit salad, and crispy bacon. For a special occasion, consider serving it with a glass of Prosecco or a sweet Moscato—the bubbles and sweetness are a fantastic match for the fruity cake. It’s also a perfect lunchbox treat or picnic dessert, as it travels well without needing refrigeration for a day.
Storage & Make-Ahead Instructions
- Room Temperature Storage: Once completely cooled, store the loaf in an airtight container or wrapped tightly in plastic wrap at room temperature for up to 2 days. This is when the texture is at its peak.
- Refrigerator Storage: For longer storage, place the airtight container in the refrigerator for up to 5 days. The cold will firm up the crumb, so let slices come to room temperature for 20 minutes before serving for the best texture and flavor.
- Freezing for Later: This cake freezes exceptionally well. Wrap the completely cooled loaf (or individual slices) tightly in plastic wrap, then in aluminum foil or a freezer bag. Freeze for up to 3 months. Thaw overnight in the refrigerator or at room temperature for a few hours.
- Make-Ahead Strategy: You can bake the loaf 1 day ahead. Let it cool completely, wrap it well, and store it at room temperature. The flavors actually meld and improve slightly overnight.
- Avoiding Sogginess: Never store the cake while it’s still warm, as the trapped steam will create condensation and make it soggy. Always ensure it’s 100% cool before sealing it in a container.
Frequently Asked Questions
Q: Can I use frozen strawberries instead of fresh?
Yes, but do not thaw them. Dice them while still frozen (it’s easier) and toss them directly in the flour. Be prepared for more color bleeding (pink batter) and a slightly wetter bake—you may need to add 5-10 minutes to the baking time.
Q: Why did my strawberries sink to the bottom?
This usually happens if the berries weren’t tossed in flour, if the batter was too thin (accurately measure your wet ingredients), or if the berries were added while still wet from washing. Always dry berries thoroughly and use the flour-coating trick.
Q: Can I reduce the sugar in this recipe?
You can reduce it to 3/4 cup for a less sweet cake, but the sugar contributes to moisture and texture. Reducing it further may result in a drier, denser loaf. I don’t recommend going below 2/3 cup.
Q: My cake is browning too quickly on top but isn’t done inside. What should I do?
This is common. Simply tent a piece of aluminum foil loosely over the top of the loaf pan for the remaining baking time. This will shield the top from direct heat and allow the center to finish cooking without burning.
Q: Can I make this into muffins instead?
Absolutely! Divide the batter into a lined muffin tin, filling each cup about 2/3 full. Bake at 375°F (190°C) for 18-22 minutes, or until a toothpick comes out clean.
This recipe makes about 12 standard muffins.
Q: What’s the best way to get clean slices?
Use a sharp, serrated bread knife and use a gentle sawing motion. For the cleanest cuts, you can even briefly run the knife under hot water and wipe it dry between slices.
Q: Can I use a different type of oil?
A neutral oil like vegetable, canola, or grapeseed is best. Avoid strongly flavored oils like olive oil. Melted and cooled butter can be substituted for a richer flavor, but the crumb will be slightly denser and the cake may stale faster.
Final Thoughts
This strawberry loaf cake embodies what I love most about baking: transforming a handful of simple ingredients into something that brings genuine joy. It’s a testament to the fact that you don’t need complicated techniques or exotic components to create a dessert that feels special. The moist, tender crumb, the sweet-tart bursts of berry, and the gorgeous simplicity of a loaf cake make it a recipe you’ll return to again and again.
I’ve shared this cake with neighbors, brought it to potlucks, and enjoyed it with my morning coffee more times than I can count. It never fails to delight.
I encourage you to give this recipe a try. Follow the tips, especially about coating those berries in flour and letting the cake cool completely, and you’ll be rewarded with a bakery-quality treat from your own oven. Once you’ve baked it, I’d love to hear how it turned out!
Share your results, your variations, or any questions in the comments below. And if you found this guide helpful, please consider sharing it with a fellow baker. Happy baking
Perfect Strawberry Loaf Cake
Ingredients
Equipment
Method
- Preheat your oven to 350°F (175°C). Grease a 9×5-inch loaf pan and line it with parchment paper, leaving an overhang on the long sides for easy removal. In a medium bowl, whisk together the 1 1/2 cups flour, baking powder, baking soda, and salt. Set this dry mixture aside.
- In a large mixing bowl, combine the sugar, eggs, sour cream, oil, and vanilla extract. Whisk vigorously for about 1-2 minutes until the mixture is completely smooth, well-emulsified, and slightly thickened. This step is crucial for a fine, even crumb.
- Add the dry flour mixture to the wet ingredients. Using a spatula, gently fold until just combined and no dry streaks remain. Be careful not to overmix. In a small bowl, toss the diced strawberries with the 1 tablespoon of flour. This helps prevent them from sinking.
- Gently fold the floured strawberries into the batter until evenly distributed. Pour the batter into your prepared loaf pan and smooth the top. If desired, thinly slice the extra strawberries and arrange them on top of the batter for a beautiful presentation.
- Bake for 55 to 65 minutes, or until a toothpick inserted into the center of the cake comes out clean or with a few moist crumbs. The top should be golden brown and spring back when lightly touched. Let the cake cool in the pan for 15 minutes, then use the parchment paper to lift it out onto a wire rack to cool completely before slicing.


