
New York pizza
There’s a specific magic to a perfect slice of New York pizza. It’s not just food; it’s an experience defined by a thin, crisp-yet-chewy crust you can fold in half, a bright, tangy sauce that isn’t too sweet, and a blanket of cheese that pulls into long, satisfying strings. As a chef who has chased that ideal from busy city pizzerias to my own test kitchen, I can tell you the secret isn’t a mystery—it’s a specific combination of technique, ingredients, and heat.
This recipe breaks down that iconic style into achievable steps for your home oven. You’ll be rewarded with a pizza that’s remarkably close to what you’d get from a classic New York corner slice shop.
- Authentic Texture & Flavor: This recipe focuses on the hallmarks of a true NY slice: a crust with a crisp underside and a tender, airy interior that folds without cracking.
- The Power of Patience: A slow, cold fermentation option for the dough builds incredible depth of flavor that you simply can’t get from a quick-rise recipe.
- Simple, Quality Ingredients: The sauce is just crushed tomatoes with a few seasonings—no long simmering needed. The flavor comes alive in the blistering heat of the oven.
- A Rewarding Technique: Learning to handle and stretch pizza dough is a satisfying skill. I’ll guide you through the process to build your confidence.
- Endlessly Customizable: Once you master the base, you can top it with anything from classic pepperoni to seasonal vegetables.
- Better Than Delivery: The pride and taste of a pizza you made from scratch, hot from your own oven, is unbeatable.
Ingredients You’ll Need
Gathering the right ingredients is the first step to pizza success. Trust me, using bread flour instead of all-purpose and low-moisture mozzarella instead of fresh is non-negotiable for achieving that classic New York structure and melt.
For the Dough:- Bread Flour: Its higher protein content (12-14%) is essential for developing the strong, chewy gluten network that gives the crust its signature fold and chew.
- Fine Sea Salt: Enhances flavor and regulates yeast activity.
- Instant Yeast: Provides a reliable rise. You can use active dry yeast; just make sure your water is at the correct lukewarm temperature to activate it.
- Water: Lukewarm water (around 95°F/35°C) wakes up the yeast without killing it.
- Olive Oil: Adds a subtle flavor and helps keep the crumb tender.
- Whole Peeled Tomatoes: I highly recommend San Marzano tomatoes for their sweet, low-acidity flavor and fewer seeds. The quality of the tomato is the soul of your sauce.
- Garlic & Oregano: These provide the classic aromatic backbone. We’re using a raw sauce, so the flavors will be bright and fresh.
- Olive Oil: Helps carry the flavors and adds richness.
- Low-Moisture Mozzarella: This is the key to the perfect melt and browning without making the pizza soggy. Pre-grated cheese often contains anti-caking agents that can hinder melting, so grate a block yourself.
- Pecorino Romano: An optional but fantastic finishing touch for a salty, umami punch.

Note: You’ll find the complete list of ingredients, along with their exact measurements, in the printable recipe card at the bottom of this post.
Kitchen Equipment Needed
You don’t need a professional pizza oven, but a few key tools will make a world of difference.
- Pizza Stone or Baking Steel: This is critical. It absorbs intense heat and transfers it quickly to the dough, creating that crisp, blistered crust a baking sheet can’t achieve. A steel conducts heat even better than a stone.
- Pizza Peel: A large, flat paddle for sliding the pizza onto the hot stone. An inverted rimmed baking sheet dusted with cornmeal can work in a pinch.
- Stand Mixer with Dough Hook: While you can knead by hand, a mixer makes developing the tough pizza dough much easier and more consistent.
- Large Mixing Bowl & Bench Scraper: For rising and portioning the dough.
How to Make New York Pizza Recipe
Step 1: Develop the Dough
In your stand mixer bowl, whisk together the bread flour, salt, and instant yeast. With the mixer on low, stream in the lukewarm water and olive oil. Let it mix on medium-low for a full 8-10 minutes.
Tip from me: this long mixing time is what develops the gluten strength for that chewy, foldable texture. The dough should become very smooth, elastic, and just slightly tacky to the touch. If it’s sticking to the bowl, add a tablespoon of flour; if it’s too dry, add a teaspoon of water.
Step 2: The First Rise
Lightly oil a large clean bowl. Form your dough into a smooth ball, place it in the bowl, and turn it to coat in oil. Cover the bowl tightly with plastic wrap.
Now, you have a choice for flavor development. For a same-day pizza, let it rise at room temperature for 1.5-2 hours until nearly doubled. For superior, complex flavor, place it directly in the refrigerator for a slow cold ferment for 24 to 72 hours.
Believe me, the patience for a cold ferment pays off in a tangier, more flavorful crust.
Step 3: Craft the No-Cook Sauce
While the dough rests, make your sauce. Drain the canned tomatoes, saving a bit of the liquid. Crush them by hand in a bowl for a rustic texture or give them a few pulses in a food processor.
Stir in the minced garlic, oregano, red pepper flakes, olive oil, and a pinch of salt. That’s it. Trust me, a raw sauce cooks perfectly in the short, intense oven heat and retains a vibrant, fresh tomato flavor that defines a great New York slice.
Step 4: Shape with Care
This is where the magic happens. Preheat your oven with the pizza stone or steel inside to its absolute highest setting (500-550°F) for at least 45 minutes. Turn your risen dough out onto a lightly floured surface, divide it in half, and cover one piece.
Gently press the other into a disc, then use your knuckles and gravity to stretch it into a 12-inch round. Avoid using a rolling pin, as it will crush the precious air bubbles we created during the rise. You want a thin center with a slightly thicker, puffy border for the crust.
Step 5: Bake to Perfection
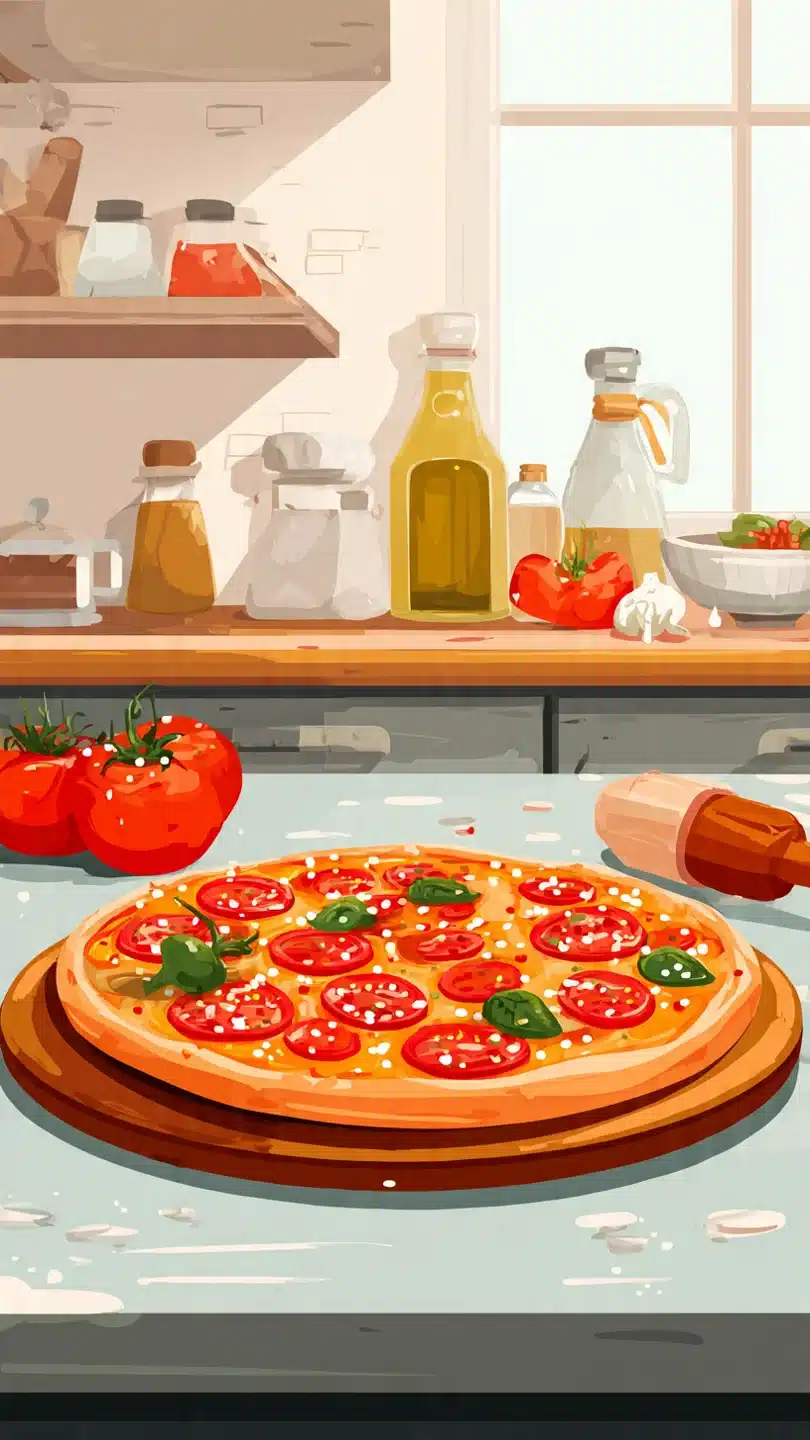
Generously dust your pizza peel with semolina or cornmeal so the pie slides easily. Lay your stretched dough on it. Spread about 1/2 cup of sauce thinly and evenly, leaving that 1-inch border bare.
Sprinkle with a generous amount of your grated low-moisture mozzarella. Now, with confident, quick motions, open the oven and slide the pizza from the peel onto the screaming-hot stone. Bake for 8-12 minutes, rotating halfway, until the crust is puffed and beautifully charred in spots and the cheese is bubbly and browned.
Step 6: Rest, Slice, and Serve
Use the peel to carefully remove your masterpiece. Let it rest on a cutting board for just 1-2 minutes—this allows the cheese to set slightly so it doesn’t all slide off when you cut it. Finish with a sprinkle of Pecorino Romano and a drizzle of olive oil if you like.
Slice it into the classic wide triangles, step back and admire your work, then take that first glorious, foldable bite.
- Flour is Key: Always use bread flour. Its high gluten content is the structural foundation for a crust that’s sturdy enough to hold toppings but tender enough to chew.
- Embrace the Cold Ferment: If you have the time, the 24-72 hour cold rise in the fridge is the single best thing you can do for flavor. The slow fermentation develops tangy, complex notes that mimic a professional pizzeria’s dough.
- Heat is Non-Negotiable: Your home oven’s maximum temperature, combined with a preheated baking stone or steel, is what creates the “oven spring” (the rapid rise) and the leopard-spotted blistering on the crust. Preheat for a full 45 minutes to an hour.
- Less is More with Toppings: Overloading the pizza is the most common home cook mistake. Too much sauce or cheese will steam the crust and make the center soggy. A thin, even layer is the goal.
- The Stretch: If the dough keeps snapping back when you try to stretch it, it means the gluten is too tight. Cover it and let it rest for 10-15 minutes; the gluten will relax, making it much easier to shape.
Recipe Variations
- The Classic Pepperoni: Add thin slices of pepperoni over the cheese before baking. For those iconic crispy, cupped ‘roni edges, place them on top of the cheese.
- White Pizza (Bianca): Omit the tomato sauce. Brush the stretched dough with olive oil and minced garlic, then top with a blend of ricotta, mozzarella, and grated Parmesan. Finish with fresh basil after baking.
- Veggie Supreme: After the cheese, scatter on thinly sliced mushrooms, bell peppers, and red onion. For vegetables with high water content like fresh tomatoes or zucchini, pat them dry thoroughly first.
- Margherita Style: Use fresh mozzarella (bocconcini), torn into pieces, instead of the low-moisture cheese. Add fresh basil leaves only after the pizza comes out of the oven to preserve their color and fragrance.
- Sausage and Pepper: Brown Italian sausage (casings removed) in a pan and drain well. Top the pizza with the crumbled sausage and thin strips of roasted red pepper.
- Gluten-Free Adaptation: Substitute the bread flour with a high-quality 1:1 gluten-free flour blend and add 1 tsp of xanthan gum to the dry ingredients. The texture will be different but still delicious.
What to Serve With This Recipe
New York pizza is a complete meal in a slice, but it pairs wonderfully with simple, fresh sides to cut through the richness. A crisp Italian salad with romaine, red onion, olives, and a sharp vinaigrette is a classic choice. For a casual gathering, serve it alongside garlic knots made from extra dough or some roasted buffalo cauliflower wings.
Beverage-wise, a cold, crisp lager or pilsner is the traditional pairing, but a bold red wine like Chianti or a non-alcoholic sparkling water with lemon also works perfectly. This pizza is ideal for game days, casual Friday night dinners, or any time you’re craving a taste of New York.
Storage & Make-Ahead Instructions
- Leftover Pizza: Store cooled slices in an airtight container in the refrigerator for up to 3 days. The best way to reheat is in a skillet: place a slice in a dry, non-stick skillet over medium-low heat, cover with a lid, and heat until the bottom is crisp and the cheese is melted again. This method restores the crust’s texture far better than a microwave.
- Freezing: You can freeze baked pizza slices. Wrap them individually in plastic wrap and then foil, and freeze for up to 2 months. Reheat from frozen in a 375°F oven until hot.
- Make-Ahead Dough: The dough is the ultimate make-ahead component. After the initial mix and a 1-hour room temperature rest, portion it, place each ball in an oiled container, and refrigerate for up to 3 days. You can also freeze the dough balls for up to 3 months; thaw overnight in the refrigerator before using.
Frequently Asked Questions
Q: Can I use all-purpose flour instead of bread flour?
A: I don’t recommend it for this specific style. Bread flour has a higher protein content (12-14%) which creates the necessary gluten strength for a chewy, foldable crust. All-purpose flour (10-12% protein) will result in a crust that’s more tender and cracker-like.
Q: My dough isn’t stretching; it keeps snapping back. What do I do?
A: This means the gluten is too tight and needs to relax. Simply cover the dough ball with a damp towel or inverted bowl and let it rest at room temperature for 10-15 minutes. The gluten strands will relax, making it much easier to stretch without resistance.
Q: I don’t have a pizza stone or steel. What can I use?
A: Preheat a heavy, rimless baking sheet or an inverted cast-iron skillet in the oven. While not ideal, it will get hotter than just placing dough on a cold sheet. You can also try the “broiler method”: preheat a regular baking sheet under the broiler for 10 minutes, then quickly assemble the pizza on the hot sheet and broil (watching carefully) until done.
Q: Why is my pizza coming out soggy in the middle?
A: Sogginess is usually caused by one of three things: too much sauce or cheese, toppings with high water content that weren’t pre-dried, or a stone/steel that wasn’t preheated long enough. Ensure your stone preheats for 45-60 minutes and use toppings sparingly and dry.
Q: Can I make the dough ahead of time?
A: Absolutely, and I encourage it! The cold fermentation method (refrigerating the dough for 1-3 days) significantly improves flavor. After the initial mix, let it rest at room temp for 1 hour, then divide, oil, and refrigerate in airtight containers.
Q: What’s the difference between a baking steel and a stone?
A: A steel is a slab of food-grade steel that conducts heat more efficiently and faster than a ceramic stone. It can deliver a more intense, quicker bake, resulting in a crisper bottom crust. Stones are more common and still produce excellent results.
Q: Is instant yeast the same as active dry yeast?
A: They are similar but not identical. Instant yeast has smaller granules and can be mixed directly into dry flour. Active dry yeast granules are larger and are typically dissolved in warm liquid first.
You can use them interchangeably here; if using active dry, dissolve it in the lukewarm water for 5 minutes before adding to the flour.
Final Thoughts
Mastering this New York pizza recipe is about embracing the process—the slow rise of the dough, the simplicity of the sauce, and the intense heat of your oven working together. It’s more than following steps; it’s understanding how flour, water, yeast, and heat create something truly special. The first time you pull a perfectly blistered, cheesy pizza from your own oven and fold a slice just like they do on the streets of Manhattan, you’ll feel an incredible sense of accomplishment.
This recipe is a foundation. Once you’re comfortable with it, make it your own. I’d love to hear how your pizza turns out—share your results and any creative topping ideas in the comments below.
Now, go preheat that oven and get ready for the best homemade slice of your life.
Authentic New York-Style Pizza
Ingredients
Equipment
Method
- Make the dough. In the bowl of a stand mixer fitted with a dough hook, combine the bread flour, salt, and instant yeast. Mix on low to combine. With the mixer running, slowly pour in the lukewarm water and 2 tablespoons of olive oil. Mix on medium-low speed for 8-10 minutes until the dough is very smooth, elastic, and cleans the sides of the bowl. It should be slightly tacky but not sticky.
- First rise. Lightly oil a large bowl. Form the dough into a smooth ball, place it in the bowl, and turn to coat in oil. Cover tightly with plastic wrap and let rise at room temperature for 1 1/2 to 2 hours, or until nearly doubled in size. You can also refrigerate it for a slow, 24-72 hour cold ferment for more complex flavor.
- Make the sauce. While the dough rises, make the sauce. Drain the canned tomatoes, reserving about 1/4 cup of the liquid. Crush the tomatoes by hand or pulse them in a food processor until mostly smooth but with some texture. In a bowl, combine the crushed tomatoes, minced garlic, oregano, red pepper flakes (if using), 1 tablespoon of olive oil, and a pinch of salt. Stir to combine. No cooking is needed—this is a raw sauce that cooks on the pizza.
- Shape the dough. Preheat your oven to its highest temperature (500-550°F / 260-290°C) with a pizza stone or steel placed on a rack in the upper third of the oven for at least 45 minutes. Turn the risen dough out onto a lightly floured surface. Divide it in half. Gently press and stretch one piece into a 12-inch round, leaving a slightly thicker outer rim for the crust. Use your knuckles and gravity to help stretch it, avoiding a rolling pin which can deflate the air bubbles.
- Assemble and bake. Lightly dust a pizza peel or an inverted baking sheet with semolina or cornmeal. Place the stretched dough on it. Spread a thin, even layer of sauce (about 1/2 cup) over the dough, leaving a 1-inch border. Sprinkle generously with the grated mozzarella. Quickly slide the pizza onto the preheated stone. Bake for 8-12 minutes, rotating halfway, until the crust is puffed and deeply golden with charred spots, and the cheese is bubbly and browned in spots.
- Finish and serve. Using the peel, carefully remove the pizza from the oven. Let it rest on a cutting board for 1-2 minutes to set. Sprinkle with grated Pecorino Romano and a drizzle of olive oil if desired. Slice and serve immediately. Repeat with the second dough ball.


