
English muffin pizza
There’s a certain magic in transforming humble pantry staples into something hot, crispy, and deeply satisfying in under 15 minutes. English muffin pizzas were a staple in my professional kitchen days for staff meal—quick, customizable, and universally loved. They’re the ultimate culinary shortcut that doesn’t taste like a compromise.
You get that delightful contrast of a crispy, nook-and-cranny-filled base, tangy sauce, and perfectly melted cheese, all in a perfectly personal-sized package. Whether it’s a frantic weeknight, a lazy weekend lunch, or a fun cooking project with kids, this recipe delivers real pizza joy with minimal effort. Let’s make it happen.
- 15-Minute Miracle: From pantry to plate in the time it takes to preheat your oven and brew a cup of tea. It’s the fastest “homemade pizza” you’ll ever make.
- Endlessly Customizable: This is a blank canvas. From classic pepperoni to veggie-packed or even breakfast-style, everyone can create their perfect pie.
- Kid-Friendly Fun: Getting little hands involved in assembly is a surefire way to make mealtime engaging and encourage them to eat what they helped create.
- Minimal Cleanup: One baking sheet, a few utensils, and you’re done. It’s the epitome of simple, satisfying cooking.
- Budget-Friendly: Uses affordable, shelf-stable ingredients you likely already have, making it a genius go-to for stretching your grocery budget.
- Perfect Portion Control: Each muffin half is a single serving, making it easy to manage portions or satisfy different cravings at the table.
Ingredients You’ll Need
Let’s gather our ingredients—this is where simple components become greater than the sum of their parts. The beauty lies in quality basics.
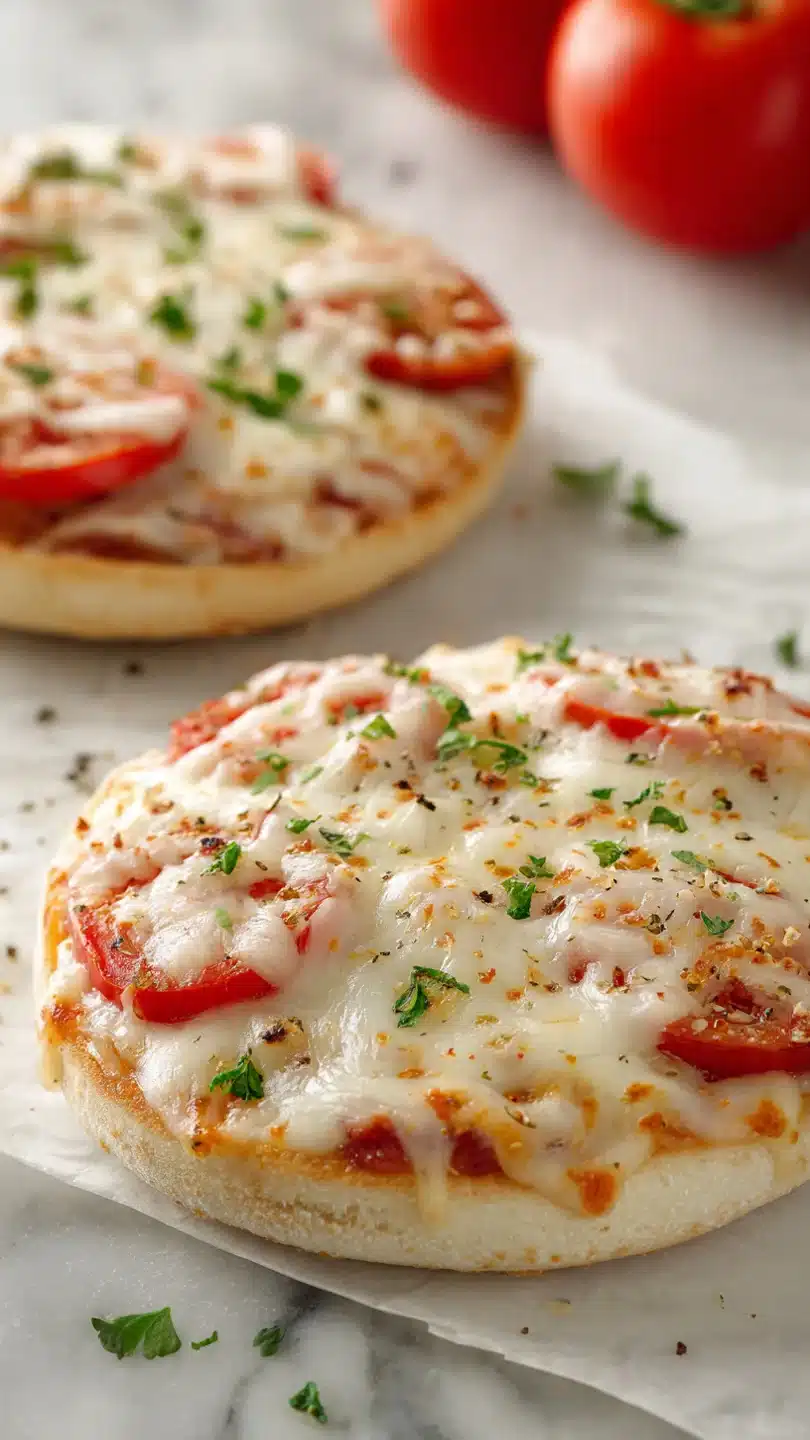
- English muffins: The foundation. I prefer plain for a neutral base, but whole wheat adds a nice nuttiness and fiber. The nooks and crannies are essential for catching sauce and cheese.
- Pizza sauce: About half a cup is perfect for 8 halves. Use a good-quality jarred pizza sauce or marinara. The flavor of your sauce directly translates to the final pizza.
- Shredded mozzarella: Low-moisture, part-skim mozzarella is my professional pick. It melts beautifully without releasing excess oil that can make the base soggy.
- Pepperoni: The classic topping, but truly optional. If using, pre-sliced is easiest. Look for cups-and-char pepperoni that curls into little crispy bowls as it bakes.
- Dried oregano & red pepper flakes: These finishing touches add a pop of aroma and heat. Fresh basil after baking is also fantastic.
The optional ingredients are where your personality shines. Think sliced mushrooms, olives, bell peppers, cooked sausage, or even a sprinkle of Parmesan cheese.

Note: You’ll find the complete list of ingredients, along with their exact measurements, in the printable recipe card at the bottom of this post.
Kitchen Equipment Needed
You don’t need any special gear for this recipe, which is part of its charm.
- Baking Sheet: A standard half-sheet pan (approximately 18×13 inches) is ideal. It gives all 8 muffin halves plenty of room for heat to circulate.
- Parchment Paper: My non-negotiable for easy cleanup and preventing any cheesy drips from sticking. Aluminum foil works in a pinch.
- Oven: Your main tool. A properly preheated oven is key to getting the muffins crisp and the cheese perfectly melted.
- Spoon or Small Offset Spatula: For spreading the sauce evenly.
- Cooling Rack (Optional): Transferring the baked pizzas to a rack for a minute prevents the bottoms from steaming and getting soft.
How to Make English Muffin Pizza Recipe
Step 1: Toast the Base
Preheat your oven to 400°F (200°C) and line your baking sheet. Arrange the split English muffin halves cut-side up. Toast them for 3-4 minutes until just lightly golden at the edges.
Believe me, this step is the secret to a crisp, not-soggy pizza. It creates a protective layer that the sauce won’t immediately soak into.
Step 2: Sauce It Up
Pull the sheet from the oven—careful, the edges are hot! Spoon about 1 tablespoon of sauce onto each half. Using the back of the spoon, spread it evenly, leaving a tiny border.
This isn’t just for looks; it gives the cheese something to grip onto as it melts, creating that perfect pull.
Step 3: Add Cheese & Toppings
Now for the cheesy blanket. Sprinkle the shredded mozzarella evenly over each sauced muffin. The goal is full coverage.
Then, artfully (or haphazardly—it all tastes the same) arrange your pepperoni or other toppings. Tip from me: if using veggies like peppers or onions, give them a quick sauté first to release moisture and concentrate flavor.
Step 4: Bake to Perfection
Slide the loaded baking sheet back into the hot oven. Bake for 8-10 minutes. You’re waiting for the cheese to be fully molten, bubbly, and dotted with those irresistible golden-brown spots.
Ovens vary, so start checking at 8 minutes. The aroma will tell you it’s almost time.
Step 5: Cool, Garnish, and Serve
This is the hardest part: patience. Let the pizzas cool on the sheet for just 1-2 minutes. This allows the cheese to set slightly so it doesn’t slide off when you pick it up.
Sprinkle with a pinch of dried oregano or red pepper flakes for that final pizzeria touch. Then, serve immediately and enjoy the crispy, cheesy, personal pizza perfection.
- The Sogginess Shield: That pre-toasting step is non-negotiable for a professional result. It’s the difference between a firm, crisp bite and a limp, doughy one.
- Cheese Science: Low-moisture mozzarella is key. Fresh mozzarella has too much water, which it releases during baking, leading to a wet pizza. Pre-shredded bags often contain anti-caking agents that can affect melt, but for this quick recipe, they work perfectly well.
- Even Heat: Make sure your oven is fully preheated and use the middle rack. If your muffins are browning too quickly on the bottom but the cheese isn’t melted, move the sheet to a higher rack for the last few minutes.
- The Topping Rule: Less is more. Overloading weighs down the base and introduces too much moisture. Stick to 1-2 toppings per pizza for the best structural integrity and flavor balance.
Recipe Variations
- Veggie Supreme: Skip the pepperoni and load up with thinly sliced mushrooms, bell peppers, red onion, and black olives. For best results, sauté the veggies briefly first to remove excess water.
- BBQ Chicken: Swap pizza sauce for your favorite barbecue sauce. Top with shredded cooked chicken, red onion, mozzarella, and a sprinkle of cilantro after baking.
- Breakfast Pizza: Use a smear of marinara or even pesto, then top with scrambled egg, cooked crumbled sausage, and cheddar cheese. A fantastic brunch option.
- Margherita Style: After baking, top with fresh basil leaves and small dollops of fresh mozzarella (bocconcini). Drizzle lightly with olive oil.
- White Pizza: Omit the red sauce. Brush muffin halves with garlic-infused olive oil, then top with ricotta cheese, mozzarella, and spinach.
- Gluten-Free: Use your favorite gluten-free English muffins or even portobello mushroom caps as the base. Adjust baking time as needed.
- Everything Bagel Pizza: Brush the toasted muffin with cream cheese, add smoked salmon or everything bagel seasoning, red onion, and capers after baking.
What to Serve With This Recipe
These mini pizzas are a complete meal on their own, but they pair wonderfully with simple sides to round out dinner. A crisp, green salad with a tangy vinaigrette is the classic and perfect companion, cutting through the richness of the cheese. For a heartier meal, serve alongside a bowl of soup like minestrone or a creamy tomato basil.
If you’re serving these as a party appetizer or game-day snack, they’re fantastic with other finger foods like chicken wings, vegetable crudités, or a simple dip. Beverage-wise, they’re kid-friendly with milk or juice, and for adults, a light lager, a glass of Chianti, or even a sparkling water with lemon complements them beautifully.
Storage & Make-Ahead Instructions
- Best Served Fresh: English muffin pizzas are truly at their peak straight from the oven. The base loses its crispness as it sits.
- Refrigerator Storage: If you have leftovers, let them cool completely, then store in an airtight container in the refrigerator for up to 2 days.
- Reheating: To recapture some crispness, always reheat in the oven or toaster oven at 350°F until warm, about 5-7 minutes. The microwave will make them very soggy.
- Freezing: You can assemble the pizzas (up to the baking step) and freeze them on the baking sheet before transferring to a freezer bag. Bake from frozen, adding 3-5 minutes to the baking time.
- Make-Ahead Assembly: The muffins can be split, toasted, and even sauced a few hours ahead. Store them uncovered in the fridge until you’re ready to add cheese, bake, and serve.
Frequently Asked Questions
Q: Can I use something other than English muffins?
A: Absolutely! This method works great with bagel halves, pita bread, flatbreads, or even thick slices of French or Italian bread. Just adjust the initial toasting time based on the thickness of your base.
Q: My cheese isn’t browning. What can I do?
A: Place the baking sheet under the broiler for the final 30-60 seconds, watching it like a hawk. The intense top heat will quickly bubble and brown the cheese. This is a great trick if your oven doesn’t have a strong bake element.
Q: Can I make these in an air fryer?
A: Yes! Air fry at 370°F for 4-6 minutes. You may need to work in batches, and there’s no need to pre-toast the muffins as the air fryer’s rapid air circulation does that job.
Q: How do I prevent the toppings from sliding off?
A: The order of operations helps: sauce first, then cheese. The cheese acts as a “glue” that holds lighter toppings in place. For heavier items like sausage, press them gently into the cheese layer before baking.
Q: Is it okay to use fresh mozzarella?
A: I don’t recommend it for this specific recipe. Fresh mozzarella has a high water content that will pool and make your muffin base soggy. Stick with low-moisture, pre-shredded or block mozzarella.
Q: Can I prepare these completely ahead of time for a party?
A: For the best texture, I recommend pre-toasting the muffins and having all toppings prepped and ready in bowls. Let guests assemble their own, then bake batches as needed. Freshly baked is always superior.
Q: Why did my muffins get soggy in the middle?
A: This is usually due to skipping the pre-toasting step, using too much sauce, or using a sauce/cheese with high water content. Ensure you toast first, spread sauce thinly, and use low-moisture cheese.
Final Thoughts
This English muffin pizza recipe is a testament to the fact that fantastic food doesn’t have to be complicated or time-consuming. It’s a technique I’ve relied on for years, from busy restaurant shifts to hectic weeknights at home, because it consistently delivers satisfaction. It empowers you to create a hot, customizable, crowd-pleasing meal with what you already have on hand.
I hope this recipe becomes a trusted staple in your kitchen, offering a solution for hungry kids, unexpected guests, or those nights when you just want something delicious without the fuss. Give it a try, make it your own with your favorite toppings, and don’t forget that crucial pre-toast for the perfect crisp base. Enjoy every cheesy, crispy bite!
Classic English Muffin Pizzas
Ingredients
Equipment
Method
- Preheat your oven to 400°F (200°C) and line a baking sheet with parchment paper. Arrange the split English muffin halves on the sheet, cut-side up. Lightly toast them in the oven for 3-4 minutes. This crucial step creates a barrier against sogginess and gives you a wonderfully crisp base. Trust me, skipping this is the most common mistake.
- Remove the baking sheet from the oven. Spoon about 1 tablespoon of pizza sauce onto each toasted muffin half, spreading it evenly to the edges. Leaving a tiny border helps prevent messy drips. For the best flavor, use a sauce you love—whether it’s a simple marinara or a seasoned pizza sauce.
- Sprinkle a generous layer of shredded mozzarella cheese over the sauce on each muffin half. The key here is even coverage. Tip from me: using pre-shredded low-moisture cheese helps it melt beautifully without making the base greasy. Now, add your pepperoni or other toppings.
- Place the baking sheet back in the preheated oven. Bake for 8-10 minutes, or until the cheese is fully melted, bubbly, and starting to develop golden spots. Keep a close eye after the 8-minute mark—oven temperatures can vary. You’re looking for that perfect melt.
- Carefully remove the pizzas from the oven. Let them cool on the baking sheet for just 1-2 minutes; this allows the cheese to set slightly so it doesn’t slide off. Sprinkle with dried oregano or red pepper flakes if desired. Serve immediately and enjoy the crispy, cheesy, perfectly portioned goodness!


