
Healthy pizza
Who says pizza night has to be a cheat day? For years in professional kitchens, I saw the struggle between craving that perfect, crispy, cheesy slice and wanting to eat well. This recipe is my solution: a healthy pizza that doesn’t compromise on flavor or satisfaction.
The secret lies in a meticulously crafted cauliflower crust that bakes up golden and sturdy, ready to hold a mountain of your favorite veggies and melty cheese. It’s the kind of dish that will make you forget you’re eating something good for you, with a texture that genuinely rivals traditional dough. Let’s make a pizza that’s as nourishing as it is delicious.
This healthy pizza is a game-changer for anyone looking to enjoy a classic comfort food in a better-for-you way. Here’s what makes it special:
- Surprisingly Crispy Crust: The double-bake method and thorough moisture removal create a crust with a satisfying crunch and no sogginess.
- Packed with Veggies: You’re getting a full serving of vegetables in the crust itself, plus more on top, boosting fiber and nutrients.
- Customizable Toppings: This is a perfect canvas for your favorite flavors, from classic Margherita to more adventurous combinations.
- Gluten-Free & Lower-Carb: Naturally free from gluten and significantly lower in refined carbohydrates than traditional pizza, fitting various dietary needs.
- Family-Friendly: It’s a fantastic way to sneak more vegetables into meals for both kids and adults, especially when they can choose their own toppings.
- Meal-Prep Friendly: The crust can be made ahead and frozen, making a healthy dinner possible on even the busiest weeknights.
Ingredients You’ll Need
- Let’s gather our ingredients—this simple list transforms humble cauliflower into a pizza masterpiece. Quality matters here, especially with the cheese. For the best melt and flavor, I recommend a block of low-moisture, part-skim mozzarella that you shred yourself. The pre-shredded bags contain anti-caking agents that can make the cheese grainy. For the cauliflower, choose a large, firm head with tightly packed florets and no brown spots.
- Cauliflower: This is our flour. One large head, riced and dried, forms the base of our crust.
- Egg: Acts as the essential binder, holding our crust together without any traditional flour.
- Parmesan cheese: Adds a salty, umami depth and helps with browning and crispiness.
- Low-moisture mozzarella cheese: Used both in the crust for structure and on top for that iconic pizza pull.
- Dried oregano & Garlic powder: These pantry staples build the foundational Italian-inspired flavor profile.
- Kosher salt & Black pepper: For seasoning every layer of the pizza.
- Marinara sauce: Opt for a brand with no added sugar for a cleaner, brighter tomato flavor.
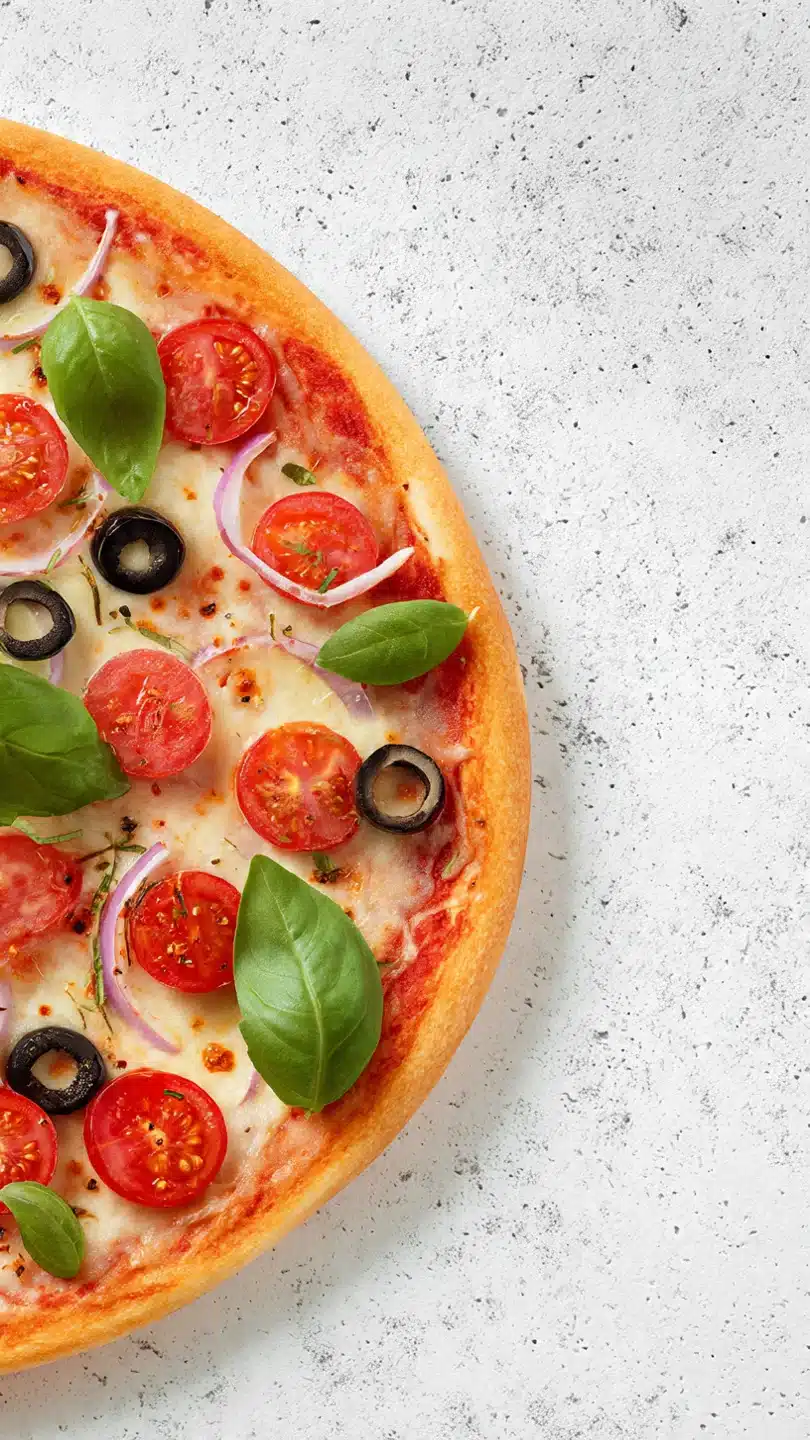
- Bell peppers, Mushrooms, & Red onion: My recommended veggie trio for color, texture, and sweetness, but this is where you get creative!
- Olive oil: A light brush on the crust before baking promotes beautiful golden color.
- Fresh basil: The perfect fresh finish, adding aroma and a pop of green.

Note: You’ll find the complete list of ingredients, along with their exact measurements, in the printable recipe card at the bottom of this post.
Kitchen Equipment Needed
You don’t need any fancy equipment, but a few key tools will make the process smoother. A food processor is the fastest way to “rice” the cauliflower, but a standard box grater works perfectly if you don’t mind a little arm workout. A large, clean kitchen towel (or a nut milk bag) is non-negotiable for wringing out the cauliflower moisture.
You’ll also need a large baking sheet lined with parchment paper—don’t skip the parchment, as it prevents sticking and makes cleanup a breeze. A mixing bowl and a brush for the oil round out the essentials.
How to Make Healthy Pizza Recipe
Step 1: Rice and Cook the Cauliflower
Preheat your oven to 400°F (200°C). Line a large baking sheet with parchment paper. Working in batches, pulse the cauliflower florets in a food processor until they resemble fine rice or couscous.
You should have about 4 cups of ‘riced’ cauliflower. Transfer the riced cauliflower to a microwave-safe bowl. Microwave on high for 5 minutes.
This step cooks the cauliflower, making it easier to bind and helping to release its moisture. Let it cool for a few minutes—trust me, it’s hot!
Step 2: The Crucial Squeeze
This is the make-or-break moment for your crust. Transfer the warm riced cauliflower to a clean, thin kitchen towel or a nut milk bag. Gather the edges and twist, squeezing out as much liquid as humanly possible over the sink.
Believe me, you want it as dry as a desert. Proper squeezing is what transforms a potential soggy mess into a crisp, sturdy crust. You’ll be amazed at how much water comes out.
Step 3: Form the Dough
In a large bowl, combine the squeezed-dry cauliflower, beaten egg, 1/2 cup parmesan, 1/2 cup mozzarella, oregano, garlic powder, salt, and pepper. Mix thoroughly until a cohesive dough forms. Tip from me: Use your hands for the best incorporation.
The mixture should hold together when pressed. If it feels too wet, you may need to squeeze the cauliflower a bit more.
Step 4: Shape and Pre-Bake the Crust
Place the dough ball onto the prepared parchment paper. Press and shape it into a 10-12 inch round or oval crust, about 1/4-inch thick. Make sure the edges are slightly thicker to contain the toppings.
Brush the entire surface lightly with olive oil—this promotes browning. Bake for 20-25 minutes, until the edges are deeply golden brown and the center is firm to the touch. This pre-bake sets the structure.
Step 5: Add Toppings and Final Bake
Now comes the fun part! Remove the crust from the oven. Spread the marinara sauce evenly over the hot crust, leaving a small border.
Top with the remaining 1 cup of mozzarella, followed by your sliced bell peppers, mushrooms, and red onion. Return the pizza to the oven and bake for another 8-10 minutes, until the cheese is bubbly and slightly spotted, and the veggies are tender.
Step 6: Rest, Slice, and Serve
Carefully remove the pizza from the oven. Let it rest on the pan for 5 minutes—this brief rest helps the crust set and makes slicing cleaner. Sprinkle with fresh basil, slice using a sharp knife or pizza cutter, and serve immediately.
Step back and admire your beautiful, healthy creation!
A few chef-level insights will ensure your healthy pizza is a resounding success every single time.
- Moisture is the Enemy: The single most important tip is to remove as much water from the cauliflower as possible. After microwaving, let it cool just enough to handle, then squeeze with all your might. I often do this in two batches with the towel to get maximum pressure.
- Crust Thickness Matters: Press the crust to an even 1/4-inch thickness. If it’s too thick, the center may stay soft; if it’s too thin, it might become brittle. Slightly thicker edges help contain the toppings.
- Pre-Bake for Structure: Never skip the initial bake before adding toppings. This step cooks the egg binder and sets the crust, creating a barrier against the sauce that prevents sogginess.
- Don’t Overload: While it’s tempting to pile on the veggies, a lighter hand with wet toppings (like fresh tomatoes or zucchini) will keep the final texture crisp. For juicier veggies, consider sautéing them briefly first to remove excess water.
- The Resting Period: Allowing the pizza to rest for 5 minutes after baking is not just for show. It lets the cheese set slightly and allows the crust to finish firming up, resulting in cleaner slices.
Recipe Variations & Customizations
- The beauty of this pizza is its adaptability. Here are some of my favorite tested variations to suit any taste or diet.
- Protein Power: Add cooked, crumbled Italian turkey sausage, sliced grilled chicken, or pepperoni for a more substantial meal.
- Mediterranean Twist: Top with crumbled feta cheese, kalamata olives, spinach, and red onion after baking. Drizzle with a little tzatziki sauce.
- Pesto Paradise: Swap the marinara for a layer of basil pesto. Top with mozzarella, cherry tomatoes, and fresh arugula added after baking.
- Vegan Version: For a vegan crust, replace the egg with a “flax egg” (1 tbsp ground flaxseed mixed with 2.5 tbsp water, let sit 5 mins) and use vegan parmesan and mozzarella cheeses.
- Spicy Kick: Add sliced jalapeños or a sprinkle of red pepper flakes to the toppings. A drizzle of hot honey after baking is also fantastic.
- Breakfast Pizza: After the initial crust bake, top with a thin layer of ricotta, cooked crumbled bacon or sausage, and crack a few eggs on top. Bake until egg whites are set.
- Cheese Lover’s: Mix different cheeses like fontina, asiago, or gouda into the topping blend for a more complex flavor profile.
What to Serve With This Recipe
This healthy pizza is a complete meal on its own, but it pairs beautifully with simple sides to create a balanced dinner. A crisp green salad with a light lemon vinaigrette is my go-to, as it cuts through the richness of the cheese. For a heartier meal, serve it alongside a bowl of minestrone soup or roasted broccoli with garlic.
Beverage-wise, a glass of sparkling water with lemon, a light Italian red wine like a Chianti, or a craft pale ale all complement the flavors wonderfully. It’s perfect for casual Friday night dinners, game day gatherings, or even a fun, interactive meal where everyone builds their own personal pizza.
Storage & Make-Ahead Instructions
- This pizza is best enjoyed fresh, but leftovers store well with the right technique.
- Refrigerator Storage: Cool leftover slices completely, then store in an airtight container in the refrigerator for up to 3 days.
- Freezing Instructions: You can freeze the fully baked and cooled pizza slices. Place them on a parchment-lined tray to freeze solid first (about 2 hours), then transfer to a freezer bag. Freeze for up to 2 months. The unbaked crust can also be frozen after the pre-bake step; wrap tightly in plastic and foil.
- Reheating: To maintain crispiness, always reheat in the oven or a toaster oven. Preheat to 375°F and bake slices on a rack for 8-12 minutes until hot and crisp. Avoid the microwave, as it will make the crust soggy.
- Make-Ahead Strategy: The crust can be pre-baked (through Step 4) up to 2 days in advance. Let it cool, wrap tightly, and refrigerate. When ready to eat, add toppings and complete the final bake, adding a few extra minutes since you’re starting from cold.
Frequently Asked Questions
Q: Can I use frozen riced cauliflower?
A: Absolutely. It’s a great time-saver. Use about 4 cups straight from the bag.
You must thaw it completely first, then squeeze out the moisture even more aggressively, as frozen cauliflower tends to retain more water.
Q: My crust is sticking to the parchment. What did I do wrong?
A: This usually means there was still too much moisture in the cauliflower mixture. Next time, squeeze harder! For now, let the pizza cool completely; the crust will often release as it cools.
You can also try a very light spray of oil on the parchment before shaping.
Q: Can I make this crust without cheese?
A: The cheese in the crust is crucial for binding and flavor. For a dairy-free version, you’ll need to use tested vegan cheese alternatives that melt well, and you may need to add an extra tablespoon of a binder like almond flour or ground flaxseed.
Q: How do I know when the crust is done during the pre-bake?
A: The edges will be a deep golden brown, and the center will look dry and matte (not shiny). If you gently lift an edge with a spatula, it should hold together firmly. If it’s still pale and soft, give it another 3-5 minutes.
Q: Can I use a different sauce?
A: Of course! Alfredo sauce, barbecue sauce, or even a simple garlic oil (olive oil infused with garlic and herbs) make delicious alternatives to traditional marinara.
Q: Why is my crust soggy in the middle?
A: The top culprits are: 1) Not squeezing enough water from the cauliflower. 2) Using a sauce or toppings that are too wet. 3) Not pre-baking the crust long enough.
4) Overloading with toppings. Address these areas next time.
Q: Is there a nut-free alternative to almond flour if I need to add a binder?
A: Yes, oat flour (ensure it’s certified gluten-free if needed) or a tablespoon of coconut flour can work. Start with a small amount, as they are very absorbent.
Final Thoughts
This healthy cauliflower crust pizza proves that you can have your pizza and eat it too—without the guilt. It’s a recipe born from a professional desire to create food that is both indulgent and nourishing, and I’m so excited for you to try it. The process is genuinely rewarding, and the result—a crispy, cheesy, veggie-packed slice—is worth every minute of squeezing that cauliflower.
Remember, cooking is about joy and nourishment. Don’t be afraid to make it your own with your favorite toppings. I’d love to hear how your pizza turns out!
Leave a comment below with your creative variations, and if you loved this recipe, please share it with friends and family who might be looking for a healthier pizza night option. Happy, healthy cooking
Crispy Cauliflower Crust Veggie Pizza
Ingredients
Equipment
Method
- Preheat your oven to 400°F (200°C). Line a large baking sheet with parchment paper. Working in batches, pulse the cauliflower florets in a food processor until they resemble fine rice or couscous. You should have about 4 cups of ‘riced’ cauliflower.
- Transfer the riced cauliflower to a microwave-safe bowl. Microwave on high for 5 minutes. Let it cool for a few minutes, then transfer it to a clean, thin kitchen towel or a nut milk bag. Squeeze out as much liquid as humanly possible. This is the most critical step for a crispy crust. Trust me, you want it as dry as a desert.
- In a large bowl, combine the squeezed-dry cauliflower, beaten egg, 1/2 cup parmesan, 1/2 cup mozzarella, oregano, garlic powder, salt, and pepper. Mix thoroughly until a cohesive dough forms. Tip from me: Use your hands for the best incorporation.
- Place the dough ball onto the prepared parchment paper. Press and shape it into a 10-12 inch round or oval crust, about 1/4-inch thick. Make sure the edges are slightly thicker to contain the toppings. Brush the entire surface lightly with olive oil. Bake for 20-25 minutes, until the edges are deeply golden brown and the center is firm to the touch.
- Remove the crust from the oven. Spread the marinara sauce evenly over the hot crust, leaving a small border. Top with the remaining 1 cup of mozzarella, followed by the sliced bell peppers, mushrooms, and red onion. Return the pizza to the oven and bake for another 8-10 minutes, until the cheese is bubbly and the veggies are tender.
- Carefully remove the pizza from the oven. Let it rest on the pan for 5 minutes—this helps the crust set. Sprinkle with fresh basil, slice, and serve immediately. Step back and admire your beautiful, healthy creation!


