
Calzone pizza dough
There’s something deeply satisfying about pulling a golden-brown, puffed calzone from your own oven. The anticipation as you cut into that crisp crust, releasing a cloud of steam and revealing a perfectly contained, molten core of cheese and sauce—it’s restaurant magic, made in your kitchen. As a chef, I believe the soul of a great calzone lies not just in the filling, but in its foundation: a dough that’s sturdy enough to be a robust pocket, yet tender and flavorful enough to be a joy to eat.
This isn’t just pizza dough folded over; it’s a specifically engineered vessel. After rigorous testing, I’ve refined a recipe that delivers a crisp, blistered exterior with a soft, chewy interior, designed from the ground up to encapsulate your favorite fillings without a hint of sogginess. Let’s make dough that transforms your calzone from good to unforgettable.
This recipe is built on professional principles for guaranteed home-kitchen success.
- Engineered for Structure: Developed with bread flour for higher protein, this dough has the strength to hold a saucy filling without tearing or becoming gummy.
- Crisp & Chewy Texture: The precise hydration and kneading technique create the ideal balance—a shatteringly crisp crust that gives way to a tender, airy crumb inside.
- Forgiving & Flexible: With clear visual cues like the “windowpane test,” you’ll know exactly when your dough is perfectly kneaded, removing the guesswork.
- Make-Ahead Friendly: The dough balls can be refrigerated for days or frozen for months, making impressive homemade calzones a quick weeknight possibility.
- Endlessly Customizable: This neutral, flavorful base is the perfect canvas for any filling combination, from classic pepperoni to creative vegetarian options.
- The Professional Touch: You’ll learn key chef techniques, like the importance of a “bench rest,” that elevate your overall baking skills.
Ingredients You’ll Need
- Let’s gather our simple, powerful ingredients. The magic of great dough lies in the quality and precision of these few staples. Using a digital scale for the flour is my strongest recommendation for consistency, but I’ve provided cup measurements as well.
- Warm Water: 1 1/4 cups (105-110°F). Temperature is critical here. Think “baby bottle warm.” Too hot kills the yeast; too cold leaves it dormant.
- Active Dry Yeast: 2 1/4 teaspoons (one standard packet). This is our leavening engine. Ensure your yeast is fresh for a good rise.
- Granulated Sugar: 1 teaspoon. This tiny amount is just food for the yeast to get it bubbling happily; it won’t sweeten the dough.
- Bread Flour: 3 1/2 cups (about 455g). The star of the show. Its higher protein content (12-14%) compared to all-purpose flour develops more gluten, which is essential for the chewy, strong structure a calzone needs.
- Olive Oil: 2 tablespoons. This enriches the dough, contributes to a tender crumb, and helps with browning.
- Fine Sea Salt: 1 1/2 teaspoons. Salt develops flavor and strengthens gluten. We add it to the flour, not directly to the yeast mixture.

Note: You’ll find the complete list of ingredients, along with their exact measurements, in the printable recipe card at the bottom of this post.
Kitchen Equipment Needed
You don’t need specialized gear, but a few key tools make the process smoother.
- Stand Mixer & Dough Hook: The easiest path to perfect kneading. If mixing by hand, a large, sturdy bowl and some elbow grease will work perfectly.
- Digital Kitchen Scale: My #1 recommended tool for baking. Flour compaction in cups varies wildly; weighing (455g flour) guarantees accuracy.
- Large Mixing Bowls: One for mixing, one (lightly oiled) for the dough to rise in.
- Plastic Wrap or Damp Towel: To cover the dough during its rise and prevent a dry skin from forming.
- Rolling Pin: For shaping your dough rounds evenly.
- Parchment Paper & Baking Sheet: For easy transfer and cleanup. A preheated pizza stone will give you the crispiest bottom crust.
How to Make Calzone Dough Recipe
Step 1: Wake Up the Yeast
In your liquid measuring cup, combine the warm water, yeast, and sugar. Give it a gentle stir and then walk away for 5 to 7 minutes. This is called “proofing.” You’re looking for the mixture to become foamy, creamy, and slightly domed—it should look like a loose beer foam.
This visual confirmation tells you the yeast is alive and active, which is the foundation of your entire rise. Trust me, never skip this step; it’s your insurance policy against flat dough.
Step 2: Combine and Mix
In the bowl of your stand mixer fitted with the dough hook, whisk together the bread flour and salt. With the mixer running on low speed, slowly pour in the foamy yeast mixture and the olive oil. Let it mix until a shaggy, floury dough ball forms, which will take about 2 minutes.
The low speed initially prevents flour from flying everywhere. You’ll notice the dough will start to pull away from the sides of the bowl as the gluten begins to develop.
Step 3: Knead to Perfection
Now, increase the mixer speed to medium (setting 4-6 on a KitchenAid) and set a timer for 6 to 8 minutes. This is where the transformation happens. The dough will go from shaggy to smooth, elastic, and slightly tacky but not sticky.
To test, stop the mixer, pinch off a small piece, and gently stretch it between your fingers. If you can stretch it thin enough to see light through it without it tearing (the “windowpane test”), it’s perfectly kneaded. Believe me, this test is a game-changer for texture.
Step 4: The First Rise
Lightly coat a clean, large bowl with olive oil. Form your smooth dough into a tight ball, place it in the bowl, and turn it once to coat it lightly in oil. This prevents drying.
Cover the bowl tightly with plastic wrap or a damp kitchen towel. Place it in a warm, draft-free spot (like an off oven with the light on). Let it rise until doubled in size, which will take 60 to 90 minutes depending on your kitchen’s warmth.
Patience here builds flavor and airiness.
Step 5: Portion and Rest
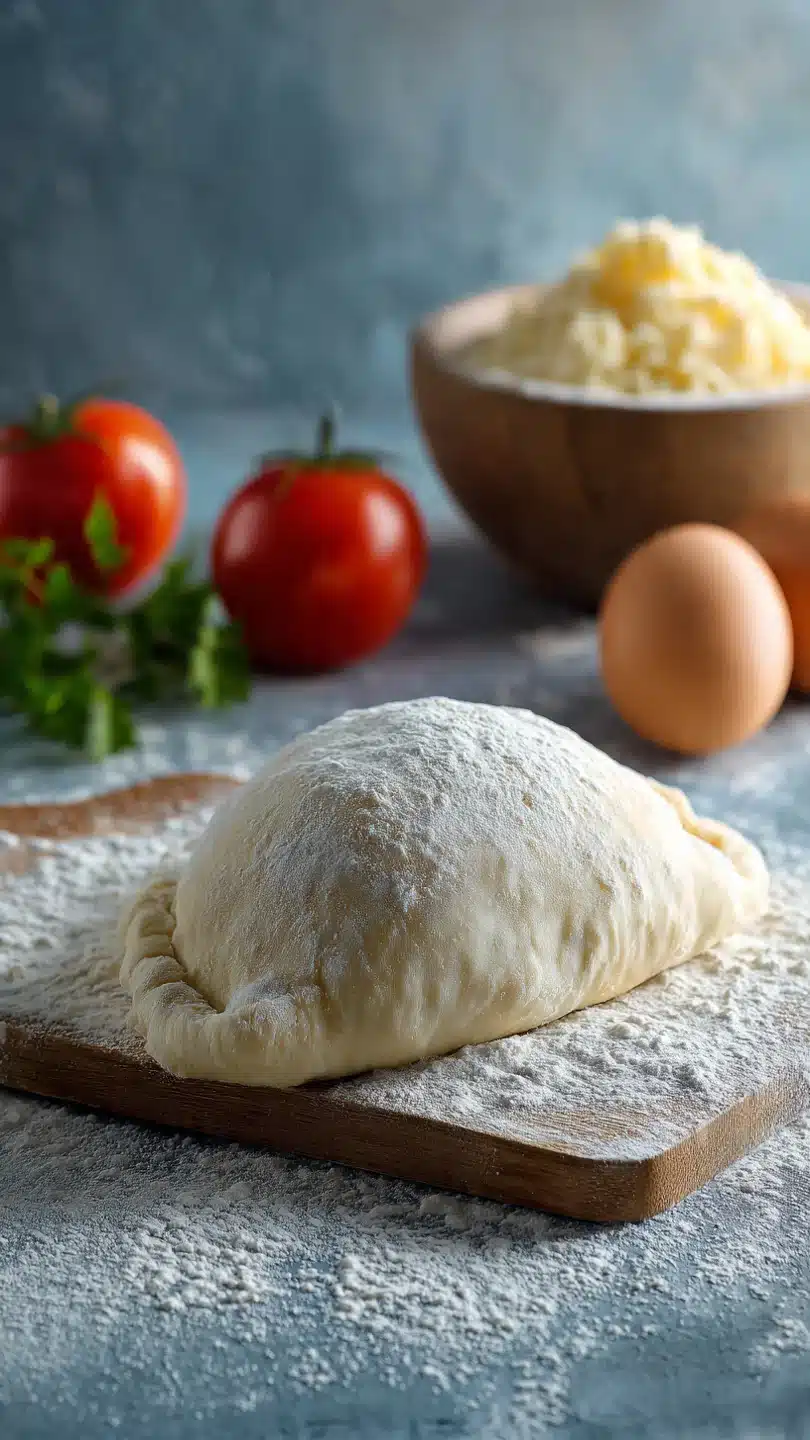
Once doubled, punch down the dough right in the center to deflate it and release the large air bubbles. Turn it out onto a very lightly floured surface. Using a bench scraper or sharp knife, divide it into 4 equal pieces (about 8 ounces or 225g each if you’re weighing).
Shape each piece into a tight, smooth ball by pulling the edges underneath. Cover the balls with a towel and let them rest for 15 minutes. Tip from me: This “bench rest” relaxes the gluten, making the dough much easier to roll out without springing back, which is key for shaping your calzone pockets.
A few insights from my kitchen years can make all the difference in your results.
- The Flour Factor: Bread flour is non-negotiable for the ideal chew. If you must use all-purpose, the dough will be softer and more prone to tearing; handle it gently.
- Temperature is Key: Your rise time is a guideline, not a rule. Dough doubles in size when it’s ready, not when the timer goes off. A cooler kitchen means a slower, more flavorful rise.
- Avoid the Tear: When rolling out your dough balls, start from the center and roll outward, turning the dough a quarter turn frequently. Aim for an even 1/4-inch thick circle. Rolling too thin is the main cause of filling blowouts.
- The Flavor Boost: For incredible depth of flavor, use the cold-ferment method. After the first rise, punch down the dough, place it in an oiled container, seal it, and refrigerate for 1-3 days. The slow fermentation develops complex, tangy notes.
Recipe Variations
- This master dough recipe is your launchpad for endless creativity.
- Whole Wheat Blend: For a nuttier flavor and extra fiber, substitute 1 cup of the bread flour with whole wheat flour. You may need to add 1-2 extra tablespoons of water as whole wheat absorbs more liquid.
- Herb-Infused Dough: Add 2 tablespoons of finely chopped fresh rosemary, thyme, or oregano to the dry flour mixture before adding the liquids for a fragrant, savory dough.
- Garlic or Chili Oil: Replace the 2 tbsp of regular olive oil with garlic-infused olive oil or a chili oil for a subtle, built-in flavor kick.
- “Everything Bagel” Calzone: Before baking, brush the shaped calzone with water and sprinkle generously with an “everything bagel” seasoning blend for a fantastic crunchy, savory top.
- Sweet Dessert Dough: Reduce the salt to 1 tsp and add 2 tbsp of sugar to the flour. This sweeter dough is perfect for filling with ricotta, chocolate chips, and fruit for a dessert calzone.
What to Serve With This Recipe
A calzone is a hearty, all-in-one meal, but the right accompaniments turn it into a feast.
For a classic Italian trattoria experience, start with a simple arugula salad dressed with lemon juice, olive oil, shaved Parmesan, and a crack of black pepper. The peppery greens and bright acidity cut through the richness of the calzone beautifully. A side of marinara sauce for dipping is absolutely essential.
For a casual gathering, a platter of roasted vegetables like bell peppers, zucchini, and onions or a charcuterie board with olives and pickles makes for great sharing. Beverage-wise, a light, fizzy Prosecco, a medium-bodied Chianti, or even a cold, hoppy IPA are all fantastic pairings that complement the savory, cheesy flavors.
Storage & Make-Ahead Instructions
- This dough’s make-ahead flexibility is one of its best features.
- Refrigerator Storage: After the first rise and portioning into balls, place each dough ball in a separate, lightly oiled container or zip-top bag. They will keep in the fridge for up to 3 days. The cold fermentation will only improve the flavor.
- Freezer for Long-Term: For storage up to 3 months, wrap each portioned dough ball tightly in plastic wrap and then place in a freezer bag. Thaw overnight in the refrigerator before using.
- Using Chilled Dough: Dough straight from the fridge will be firm. Let it sit at room temperature, covered, for about 30 minutes before attempting to roll it out to allow the gluten to relax.
- Baked Calzone Storage: Leftover baked calzones can be stored in an airtight container in the refrigerator for 3-4 days. Reheat in a 350°F oven or toaster oven until crispy and hot throughout (about 10 minutes). Avoid the microwave, as it will make the crust soggy.
Frequently Asked Questions
Q: Can I make this dough by hand without a stand mixer?
Absolutely. In a large bowl, mix the ingredients with a wooden spoon until combined, then turn out onto a floured surface. Knead by hand for 10-12 minutes, using the heel of your hand to push the dough away from you, then fold it back over.
It’s a great workout and you’ll feel the dough transform under your hands as it becomes smooth and elastic.
Q: My dough didn’t double in size. What went wrong?
The most common culprits are old/inactive yeast or water that was too hot (which kills yeast) or too cold (which doesn’t activate it). Ensure your yeast is fresh and your water is accurately between 105-110°F. The environment might also be too cold; try placing the covered bowl in a slightly warmed oven (turn it off after warming) or on top of the refrigerator.
Q: Can I use all-purpose flour instead of bread flour?
You can, but the results will differ. All-purpose flour has less protein (10-12%), so the dough will be softer, less chewy, and more prone to tearing when you handle and fill it. If you use AP flour, handle it gently and be prepared for a slightly more delicate final product.
Q: How thin should I roll the dough for each calzone?
Aim for a circle about 1/4-inch thick and 9-10 inches in diameter. This is the sweet spot: thick enough to be sturdy and contain the filling without leaking, but thin enough to cook through and become crisp. Rolling it too thin (like for a pizza) is a common mistake that leads to blowouts.
Q: Why do you let the portioned dough balls rest before rolling?
This 15-minute “bench rest” is crucial. After dividing and shaping, the gluten in the dough is very tight and elastic. If you try to roll it immediately, it will fight you and spring back.
The short rest allows the gluten strands to relax, making the dough pliable and easy to shape into a thin circle.
Q: How do I prevent my calzone from leaking filling during baking?
First, don’t overfill—leave a 1-inch border. Second, ensure the edges are completely sealed: press firmly, then go back and crimp or fold the edge over itself. Finally, brush the sealed edge with a little water before the final press to create a better bond.
A tight seal is your best defense.
Q: Can I freeze the unbaked, filled calzones?
Yes, for a fantastic freezer meal. Assemble the calzones, place them on a parchment-lined sheet, and freeze until solid (about 2 hours). Then wrap each individually in plastic wrap and foil.
Bake from frozen, adding 5-10 minutes to the baking time. No need to thaw.
Final Thoughts
Mastering this calzone dough recipe is about more than just following steps; it’s about understanding the simple science of flour, water, yeast, and time. You’re not just making dinner—you’re building a skill that will reward you with countless delicious, impressive meals. The pride of serving a homemade calzone with a crust that crackles and a filling you’ve tailored to your taste is unbeatable.
This dough is reliable, versatile, and, with the make-ahead tips, fits seamlessly into real life. I encourage you to try it, trust the process, and don’t be afraid to make it your own with the variations. Once you experience that perfect, cheesy pull from a calzone you built from scratch, there’s no going back.
Please share your creations and any questions you have—happy baking
Perfect Calzone Dough
Ingredients
Equipment
Method
- In a liquid measuring cup, combine the warm water, yeast, and sugar. Stir gently and let sit for 5-7 minutes until foamy and creamy. This ‘proofing’ step confirms your yeast is alive and active.
- In the bowl of a stand mixer fitted with the dough hook, combine the bread flour and salt. With the mixer on low, slowly pour in the yeast mixture and olive oil. Mix until a shaggy dough forms, about 2 minutes.
- Increase the mixer speed to medium and knead for 6-8 minutes. The dough is ready when it pulls cleanly away from the sides of the bowl, is smooth, and passes the ‘windowpane test’ (you can stretch a small piece thin enough to see light through without tearing).
- Lightly oil a large bowl. Form the dough into a smooth ball, place it in the bowl, and turn to coat in oil. Cover tightly with plastic wrap or a damp kitchen towel. Let rise in a warm, draft-free place for 60-90 minutes, or until doubled in size.
- Punch down the risen dough to release air bubbles. Turn it out onto a lightly floured surface and divide into 4 equal pieces (about 8 oz each). Shape each into a tight ball, cover, and let rest for 15 minutes before rolling out and filling. This ‘bench rest’ relaxes the gluten for easier shaping.


